
Introduction
The roundworm Caenorhabditis elegans has been used as a model organism for neuroscience, developmental and molecular biology, and genetics for over 40 years [1]. It was the first multicellular organism to have its entire genome sequenced [2] and, until the present time, is the only organism whose connectome, i.e., diagram of neuronal connections in the nervous system, is fully mapped [3]. The worm is a eutelic organism with a genetically determined number of cells which remain constant at the end of the larval stage and its nervous system contains 302 neurons (nerve cells). The worm is used as a model organism for studies in neurological development, cellular differentiation, apoptosis (programmed cell death), aging, etc. A large number of genes in C. elegans can function in similar ways to those of mammalians. About 1/3 of genes in the C. elegans genome are homologous (derived from common ancestors) with some human genes and, as a result, make the worm useful as a model organism for the study of human-related diseases. The worms are quite easy and fast to cultivate in the laboratory and are usually kept just below room temperature (15–20 °C). Adult worms are about 1 mm in length and less than 75 μm in diameter. They are kept on agar plates, i.e., an agar gel inside a petri dish, with bacteria (E. coli) as food.

General work steps for C. elegans
There are several common steps for routine laboratory work with worms (Figure 1):
- Picking worms [4];
- a) Transgenesis [5, 6]: microinjection of a transgene into the worm to modify its genome;
b) RNA interference (RNAi) [7]: introduction of double stranded (ds) RNA into the worm to inhibit gene expression; - Screening: assessing worms to detect successful RNAi or transgenesis;
- Study the molecular biology, biochemistry, genetics of the worm with various methods;
- Documentation or functional imaging of worms, often done with confocal or compound microscopy.
The work steps shown above are not necessarily done in a linear sequence, i.e., a non-linear “workflow”. First, worms must be selected and “picked”, next comes the manipulation of gene or protein expression, followed by breeding worms for a period of time. Then the worms are distinguished by phenotype (observable characteristics) to find those with the sought-after traits. If there are too few of these worms, the previous steps may be repeated. When there is a sufficient number of worms having the traits of interest, they are “picked” again, immobilized, and finally functional imaging is performed.
The photos below (Figure 2) show a typical worm lab at the Dept. of Molecular Microbiology of the University of Constance in Germany.
.")
Key considerations for optimizing work efficiency
Optimization of the work efficiency will depend on application and use, namely whether laboratory research or teaching in a classroom.
Worm cultivation and imaging in general
There are several points to consider when cultivating, picking, screening worms, etc.:
- avoid refocusing when changing agar plates → same amount of agar (same height ) in each one
- get sharper microscope images of worms → lower concentrations of bacteria (food) on agar
- reduce fluorescence background (autofluorescence) for worm imaging plates → with a thin agar layer and no peptone [4]
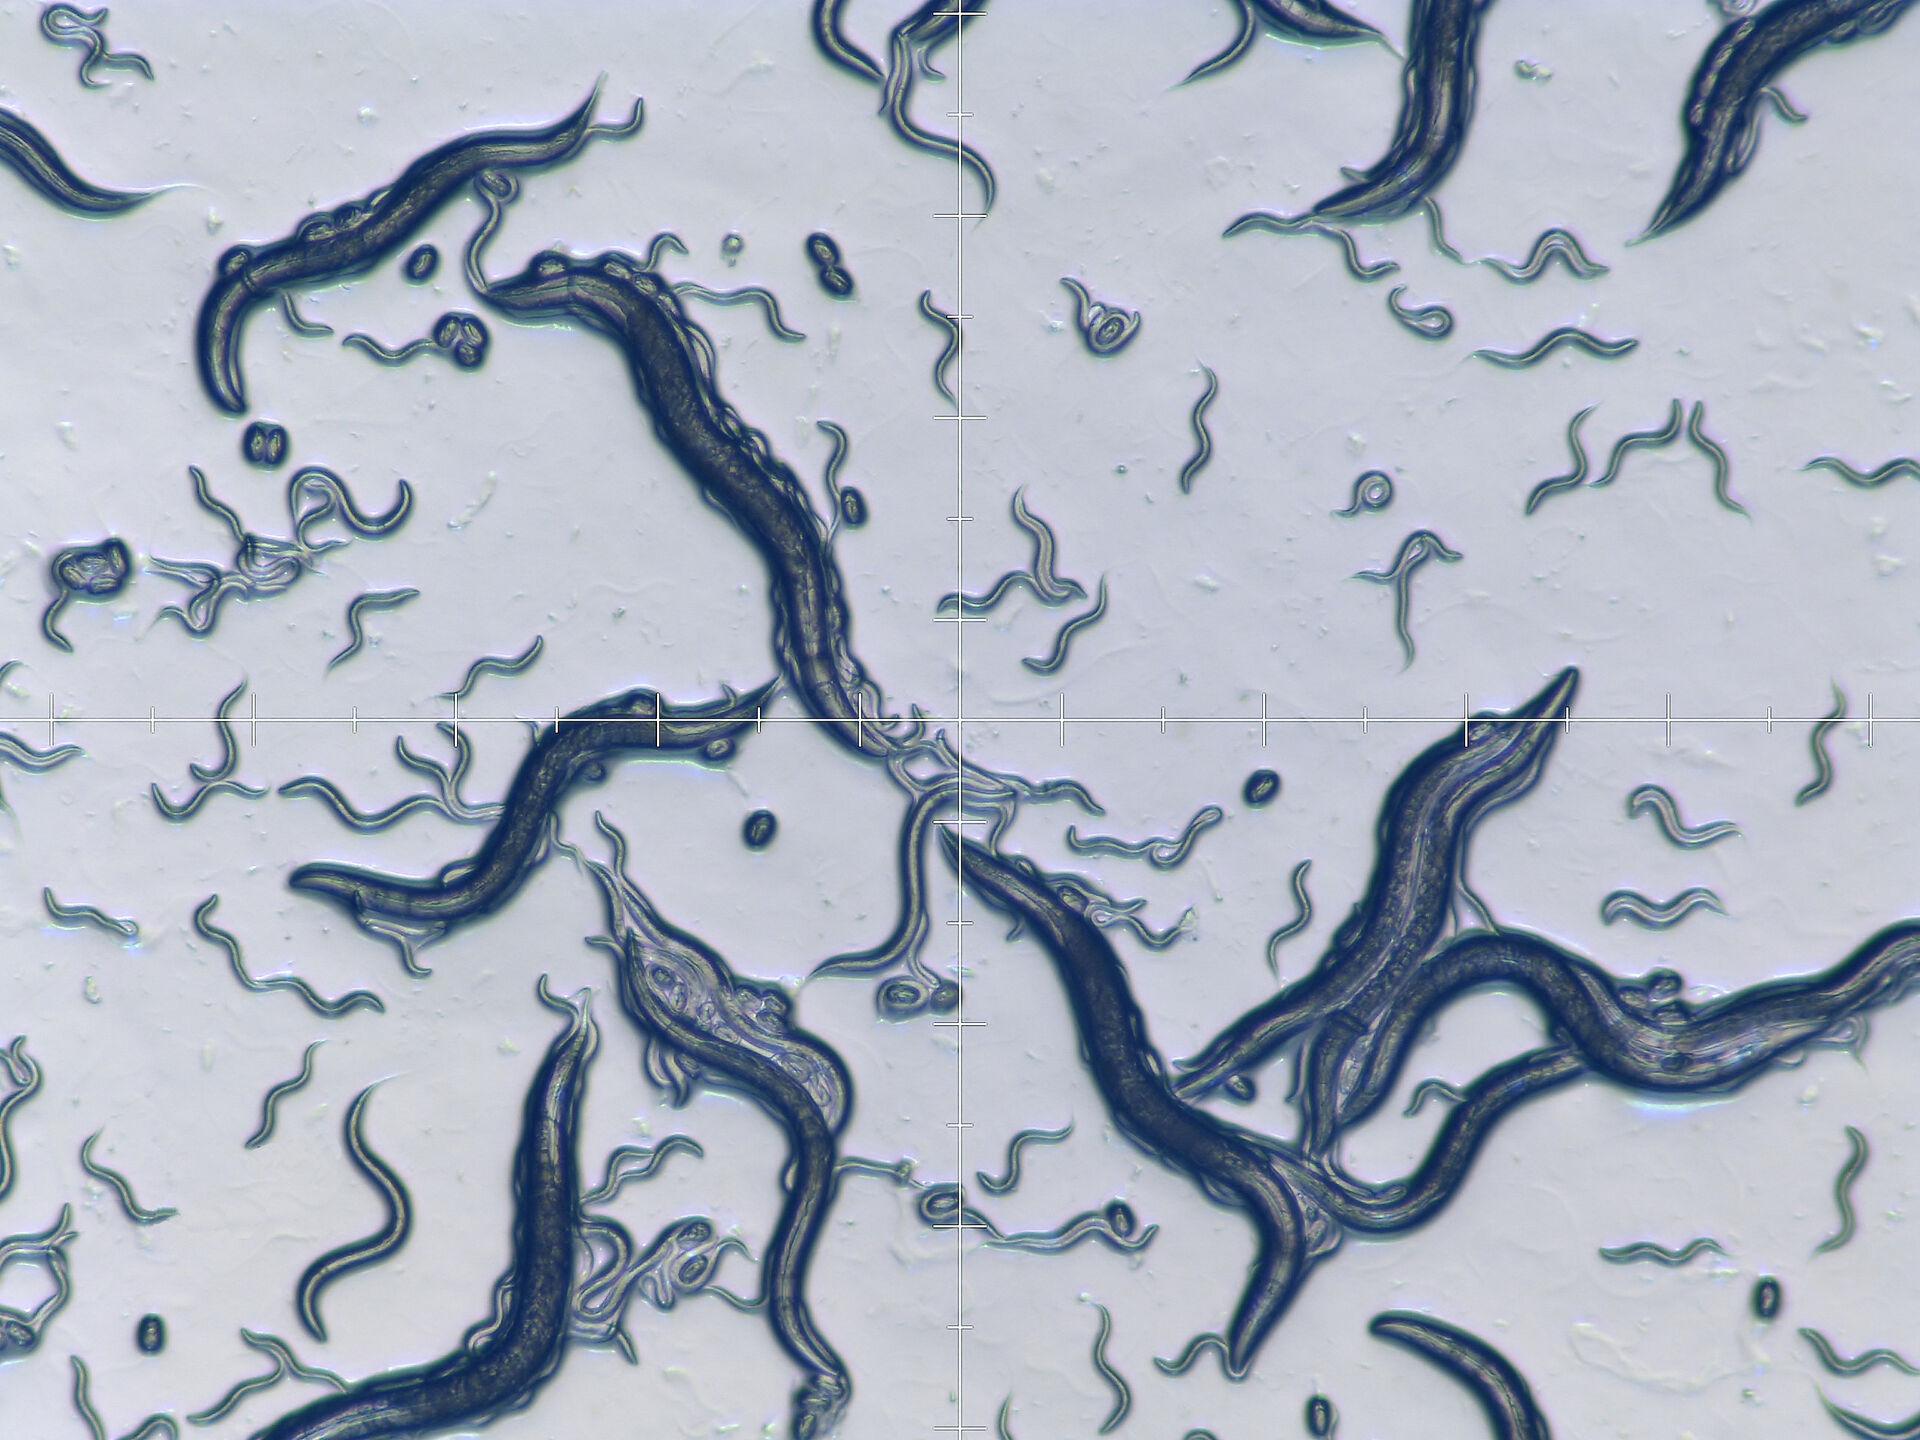
- worms must be distinguished from agar → good contrast is important with transmitted light
- detect a fainter fluorescence signal for better image results → good fluorescence signal-to-noise (S/N) ratio and dark background critical
- ensure good contrast and high resolution when imaging worms at higher total magnification (above 60x)
Worm picking
Research labs
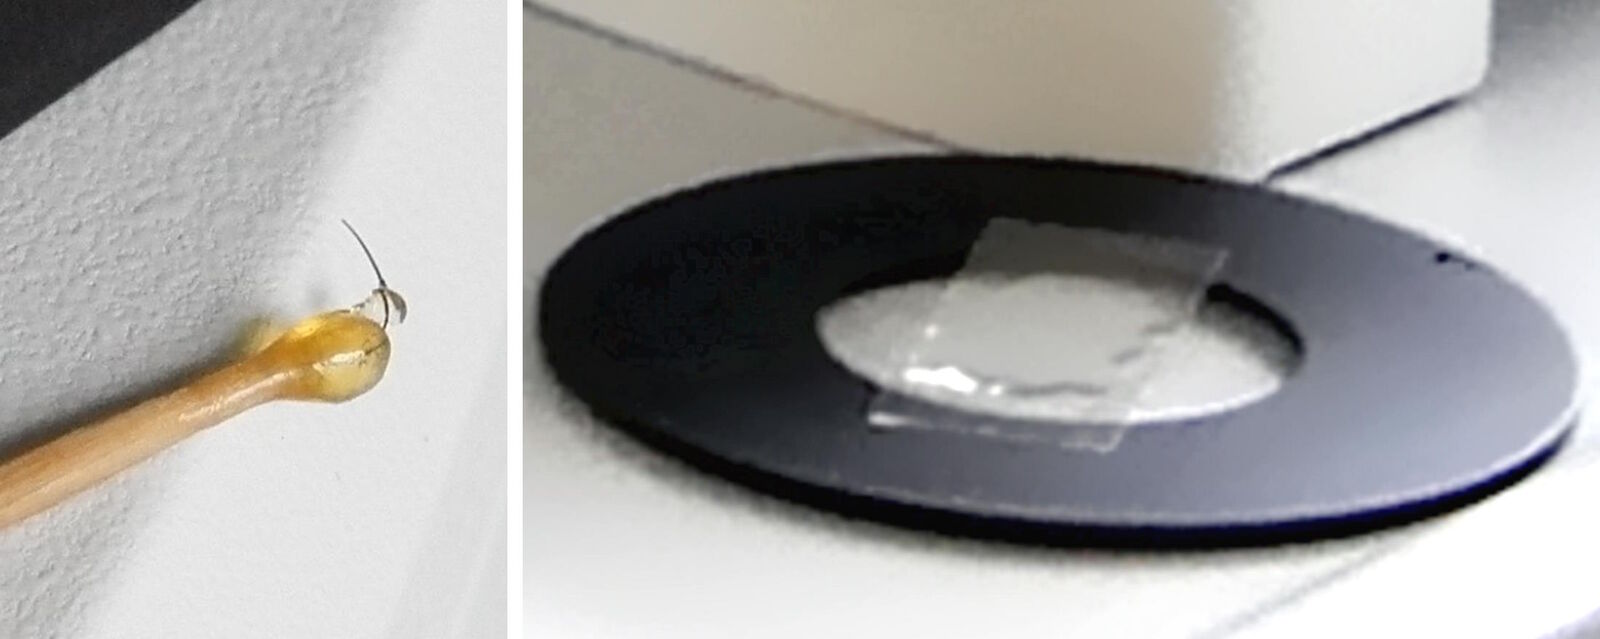
When picking suitable worms and preparing them for genetic or biochemical analysis, often the worms are selected using a stereo microscope and picked with a small platinum wire or eyelash (Figure 3). Then, for genetic modification via microinjection in the worms’ gonads, they are placed onto a small, dry agar pad on a glass slide (Figure 3).
Classroom and teaching laboratory
Teaching requires different considerations than research applications. The risk of contaminating the microscope optics with the agar or worm picking utensils needs to be reduced. A Leica stereo microscope [8] for instance, offers a convenient working distance, high magnification, and a large depth of field to help cope with those challenges and work efficiently. In combination with a LED illumination [9] (Figure 4), a Leica stereo microscope is a good solution for worm picking in classrooms and teaching laboratories. Inexperienced students tend to prefer high magnification, so eyepieces with the higher magnification of 16x are recommended instead of the more common ones with only 10x.
 of C. elegans on agar recorded with a Leica Greenough stereo microscope and the LED2500 light stand (left). Sharp contrast in the image allows the worms to be easily distinguished from the agar.")
Worm screening in Brightfield
Efficient screening of worms for faster throughput can be achieved with several stereo microscope systems from Leica Microsystems. A stereo microscope [8] with a LED light stand or small illumination subbase [9] (Figure 5) is practical for worm screening. Due to a compact design, the microscope also takes up less space in the laboratory. Worm images with high contrast, even at low magnification, are easily acquired with these microscopes. They are especially good solutions for teaching staff.
 of C. elegans on agar recorded with a Leica Greenough stereo and illumination subbase (right). Image taken with one-sided darkfield illumination using the diffuse reflection mirror of the subbase to enhance contrast of the worms.")
The table below lists the different advantages for worm screening in brightfield with the a Leica stereo microscope when using either a LED light base or subbase illumination.
| Comparison of Advantages: Light Base and Subbase for Leica stereo microscopes | |
|---|---|
| LED light base | Illumination subbase |
|
|
Efficient worm screening can be also achieved with the M80 stereo microscope [10] using a TL3000 Ergo light base (Figure 6) [11]. The M80 has a common main objective (CMO), so there are no tilted focus planes and the entire field of view is in sharp focus for both eyes. Also the system is modular and allows you to flexibly add, exchange or replace components very quickly. If specimen image observation by multiple users simultaenously is desired, along with the recording of high resolution images for reports, then a digital camera can be installed. For example, a Leica digital microscope camera [12] produces both high definition live and recorded images.
 of C. elegans on an agar plate taken with the Leica M80 using a Leica TL3000 ST light base (right). Darkfield helps to better view the worms.")
Transgenesis, Microinjection, and RNAi
There are several ways to alter the gene/protein expression of a worm. Stable and transient gene modification is carried out with microinjections into the worm. The two main methods are: transposons [13], also known as jumping genes, or the CRISPR/Cas9 [14] system. The transgenic yield with CRISPR is lower and requires one generation cycle for selection, but the transgene insertion is more stable. The transposon method is efficient with higher yields, requiring fewer worms to be injected, but it is not always clear where the transgene integrates into the genome.
Once worms have been placed onto a dried agar pad on a glass slide, it is important to work quickly, otherwise the worms may desiccate and die during the procedure. To slow down desiccation of a worm, normally it is covered with oil, such as halocarbon or paraffin [6]. Typically, the microinjection should be completed in less than 5 minutes. The slide with agar pad is placed onto the stage of an inverted microscope, a worm is located, and the transgene (DNA) is injected into the distal gonad.
Then the worm is covered with recovery buffer solution [6], picked with a platinum wire or eyelash and placed onto an individual agar plate for further cultivation and propagation. This work step is usually carried out on a manual, inverted compound microscope equipped with differential interference contrast (DIC) [15] or integrated modulation contrast (IMC) illumination [16], such as the DMi8 (Figure 7) or the DM IL LED [17]. It is strongly recommended to have an anti-vibration setup under the microscope for higher yield.
For precise positioning of a needle for microinjection, it is practical to use a high precision, 3-axis, oil manipulator, such as one from Narishige Instruments.
RNA interference (RNAi) is used to alter protein expression at the translation level. It is carried out by feeding the worms with transgenic bacteria expressing double stranded (ds) RNA. The worms ingest the dsRNA, it enters into all of the worm’s cells (except the neurons), it gets processed by the cellular biochemistry, and then short interfering (si) RNA is produced. Once present in the cells, the siRNA alters protein expression.

Transgenic worm breeding and fluorescence screening
After injection, the worms are further cultivated and the next generation is used for experiments. The worms are kept at 20 °C for propagation. Desiccation of the worms must be avoided, so the agar plates are usually stored in plastic boxes. To get very high numbers of worms, liquid cultures in an Erlenmeyer flask are a second possibility.
Approximately five worms are sufficient for a western blot analysis (identify proteins) [18]. However 100,000 worms are required for differential gradient centrifugation to separate cellular organelles and proteins by density [19].
Because the transgenes are usually combined with green fluorescent protein (GFP) [20] they can be selected using fluorescence stereo microscopes. Other fluorescent markers like DsRed [20] can be toxic at high expression levels, so usually GFP is the marker of choice.
Worms have to be located using brightfield and other contrasts (large field of view [FOV]), checked for a fluorescence signal, and then picked for additional experiments. For imaging, younger worms are generally preferred as older ones usually exhibit higher autofluorescence, especially in the gut. The chosen worms are placed onto special, small agar plates with no peptone nor bacteria to minimize the autofluorescence. The agar layer is often very thin to reduce the autofluorescence even further.
Efficient fluorescent screening of worms can be done with a M165 FC [21] or MZ10 F [22] fluorescence stereo microscope using a Leica TL light base (Figure 8).
 of C. elegans taken with a Leica microscope camera using a transmitted light base (right). The Rottermann contrast enables the worms on the agar background to be cleary visible.")
Advantages
- Single cells of a worm are easily distinguished, due to the many illumination contrast possibilities available.
- Fast switching of the contrast for advanced documentation and imaging.
- Intense fluorescence signal due to highest signal-to-noise (S/N) ratio with TripleBeam technology → separate beam paths for excitation and observation.
A video of C. elegans worms on an agar plate can be viewed, just click on the video below. Only the emitted light from fluorescence is detected, no other illumination is used (dark background). Most worms seen in the video show some autofluorescence in the gut [23]. Only one worm is double positive and also shows a bright signal from the fluorescent protein mCherry [20] expressed in its pharynx. The video is recorded with a M205 FA fluorescence stereo microscope using a Leica digital microscope camera. The video playback speed is slightly faster than the original recording speed, so the worms may appear to move faster than in reality.
Important considerations for fluorescence screening
- To achieve the highest contrast and resolution, a transmitted light base with its sophisticated construction acts like a light condenser at high magnification.
- Little or no background light “noise” for fluorescence imaging is produced by the Leica TL bases.
- Avoid heating the worms when undesired using a Leica TL base with external light source.
- For the case of high autofluorescence, reducing fluorescence excitation intensity will increase the S/N ratio. In many cases, the fluorescence signal from the worms is maximal and cannot increase more, but the background always can.
- Depending on the budget and demands of individual users, the TL3000 or TL5000 Ergo [11], light bases can all be used.
Functional imaging
Confocal and compound microscopes, such as the STELLARIS confocal system [24] and the DM6 or DM2500 upright compound microscope [25], are normally used for imaging and documentation of worms to obtain high resolution images of subcellular and macromolecular structures.
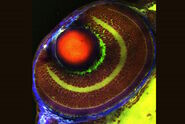
For confocal imaging, the worm is expressing fluorescent proteins, i.e. GFP, red fluorescent protein (RFP, mCherry, or DsRed), yellow fluorescent protein (YFP), or cyan fluorescent protein (CFP) [20], as mentioned above (Fig. 9 and 10).
Confocal microscopes with the upright configuration are preferable, because the worms are on the top of the agar layer in the plates. The worms move relatively quickly, so they are usually anesthetized by the drug Levamisol and then a coverslip is placed over them for observation by liquid immersion objectives.
Young worms in the larval stage can be very sensitive to light, so using the confocal resonant scanner, due to the short dwell rate, can reduce the problem of phototoxicity to a minimum. The resonant scanner allows for long term observation of C. elegans larvae without noticeable damage.
 and confocal (right) image of the pharynx of C. elegans expressing GFP. Both images were taken with a Leica confocal microscope system.")
![Fig. 10: Leica confocal image of the brain and nervous system of C. elegans (viewed from ventral side of worm). The neuron cells are expressing the fluorescent proteins CFP, GFP, YFP, and DsRed, and additionally labelled with the white lipophilic tracer dye DiD. Image courtesy of H. Hutter, Dept. of Biological Sciences, Simon Fraser University, Burnaby, BC, Canada [26].](/fileadmin/user_upload/C_elegans-10-Confocal-image-of-the-brain-and-nervous-system-of-C-elegans_02.jpg "Leica confocal image of the brain and nervous system of C. elegans (viewed from ventral side of worm). The neuron cells are expressing the fluorescent proteins CFP, GFP, YFP, and DsRed, and additionally labelled with the white lipophilic tracer dye DiD.")
Fig. 10: Confocal image (Leica SP2) of the brain and nervous system of C. elegans (viewed from ventral side of worm). The neuron cells are expressing the fluorescent proteins CFP, GFP, YFP, and DsRed, and additionally labelled with the white lipophilic tracer dye DiD. Image courtesy of H. Hutter, Dept. of Biological Sciences, Simon Fraser University, Burnaby, BC, Canada [26].
Summary and conclusions
Common methods for C. elegans [27] involve multiple work steps using stereo, compound, or confocal microscopy. The demands of a worm lab can vary. Several configurations and instruments can be used to address specific tasks done in the work steps.
Below is a list of commonly used microscope solutions:
- Worm picking is often done with a Greenough stereo microscope using a transmitted light base producing high contrast;
- Transgene microinjection is achieved with an inverted compound microscope, such as the DMi8, using a micromanipulator to the position the needle and an injector for the DNA. In addition, integrated modulation contrast is the illumination method of choice;
- Fluorescence screening can be accomplished with a range of fluorescence stereo microscopes, e.g. the MZ10 F or M165 FC, using a transmitted light base achieving very good contrast;
- Brightfield screening is usually performed with a common main objective (CMO) stereo microscope, such as the M80, having a transmitted light base with high contrast;
- Functional imaging, i.e., the characterization of transgenic worms for studies like cellular differentiation, apoptosis (programmed cell death), aging, neuronal activity, etc., is done with upright compound or confocal microscopy, such as the DM6 or STELLARIS 8;
- Immobilized worms can also be imaged at reasonable resolution with a higher performance fluorescence stereo microscope, such as the M205 FA, and transmitted light base, e.g. TL5000 Ergo [11];
- To image worm embryos, a confocal resonant scanner is recommended for low phototoxicity; and
- For classrooms, instruction laboratories, and training, the microscope setup requirements can vary from those for research laboratories.
This short report can be a useful reference or guidelines when setting up a worm lab and explain the various instruments needed to carry out the necessary work steps efficiently.
Acknowledgements
We would like to thank Prof. Harald Hutter, Dept. of Biological Sciences, Simon Fraser University, Burnaby, BC, Canada for supplying the confocal image of the C. elegans brain and nervous system.
References
- Brenner S: Nature’s Gift to Science. Nobel Prize Lecture (December, 2002), The Nobel Foundation.
- The C. elegans Sequencing Consortium, Genome Sequence of the Nematode C. elegans: A Platform for Investigating Biology, Science 282 (1998).
- Emmons SW: The beginning of connectomics: a commentary on White et al. (1986) – The structure of the nervous system of the nematode Caenorhabditis elegans – Philosophical Transactions of the Royal Society B 370 (1666) (2015); doi: 10.1098/rstb.2014.0309.
- Stiernagle T: Maintenance of C. elegans. Wormbook: The Online Review of C. elegans Biology (2006).
- Schweinsberg PJ, and Grant BD: C. elegans gene transformation by microparticle bombardment. Wormbook: The Online Review of C. elegans Biology (2013).
- Evans TC: Transformation and microinjection. Wormbook: The Online Review of C. elegans Biology (2006).
- Ahringer J: Reverse genetics. Wormbook: The Online Review of C. elegans Biology (2006).
- Leica Stereo Microscopes, Leica Microsystems Website.
- Illumination for Leica Stereo Microscopes, Leica Microsystems Website.
- M50, M60, M80 – Brochure. Leica Microsystems Website.
- Leica Transmitted Light Bases. Leica Microsystems Website.
- Leica Digital Microscope Cameras, Leica Microsystems Website.
- Pray LA: Transposons: The jumping genes. Nature Education 1 (1): 204 (2008).
- Ran FA, Hsu PD, Wright J, Agarwala V, Scott DA, and Zhang F: Genome engineering using the CRISPR-Cas9 system. Nature Protocols 8: pp. 2281–308 (2013); doi: 10.1038/nprot.2013.143.
- Ockenga W: Differential Interference Contrast (DIC). Science Lab.
- Kleine B, and Veitinger T: Integrated Modulation Contrast (IMC): Oblique Illumination Enhances Visibility of Living Cells. Science Lab.
- Leica Inverted Compound Microscopes, Leica Microsystems Website.
- Mahmood T, and Yang P-C: Western Blot: Technique, Theory, and Trouble Shooting. N. Am. J. Med. Sci. 4 (9) 429–34 (2012); doi: 10.4103/1947-2714.100998.
- Mašek T, Valášek L, and Pospíšek M: Polysome analysis and RNA purification from sucrose gradients. Methods Mol. Biol. 703: 293–309 (2011); doi: 10.1007/978-1-59745-248-9_20.
- Greb C: Fluorescent Proteins – Introduction and Photo Spectral Characteristics. Science Lab.
- M165 FC, M205 FA – Brochure. Leica Microsystems Website.
- MZ10 F – Brochure. Leica Microsystems Website.
- Pincus Z, Mazer TC, and Slack FJ: Autofluorescence as a measure of senescence in C. elegans: look to red, not blue or green. Aging 8 (5): 889–98 (2016).
- Leica Confocal Systems, Leica Microsystems Website.
- Leica Upright Compound Microscopes, Leica Microsystems Website.
- Hutter H: Five-colour in vivo imaging of neurons in Caenorhabditis elegans. Journal of Microscopy 215 (2): 213–18 (2004); doi: 10.1111/j.0022-2720.2004.01367.x.
- Worm Book: The Online Review of C. elegans Biology.
Related Articles
-

How do Cells Talk to Each Other During Neurodevelopment?
Professor Silvia Capello presents her group’s research on cellular crosstalk in neurodevelopmental…
Apr 03, 2024Read article -

The Shape of the Brain: Spatial Biology of Alzheimer’s Disease
Uncover cell identity and brain structure in Alzheimer's disease with Cell DIVE multiplexed imaging,…
Nov 29, 2023Read article -
Coherent Raman Scattering Microscopy Publication List
CRS (Coherent Raman Scattering) microscopy is an umbrella term for label-free methods that image…
Sep 11, 2023Read article