
What are 5 of the advantages of inverted microscopes over upright microscopes?
1) More freedom
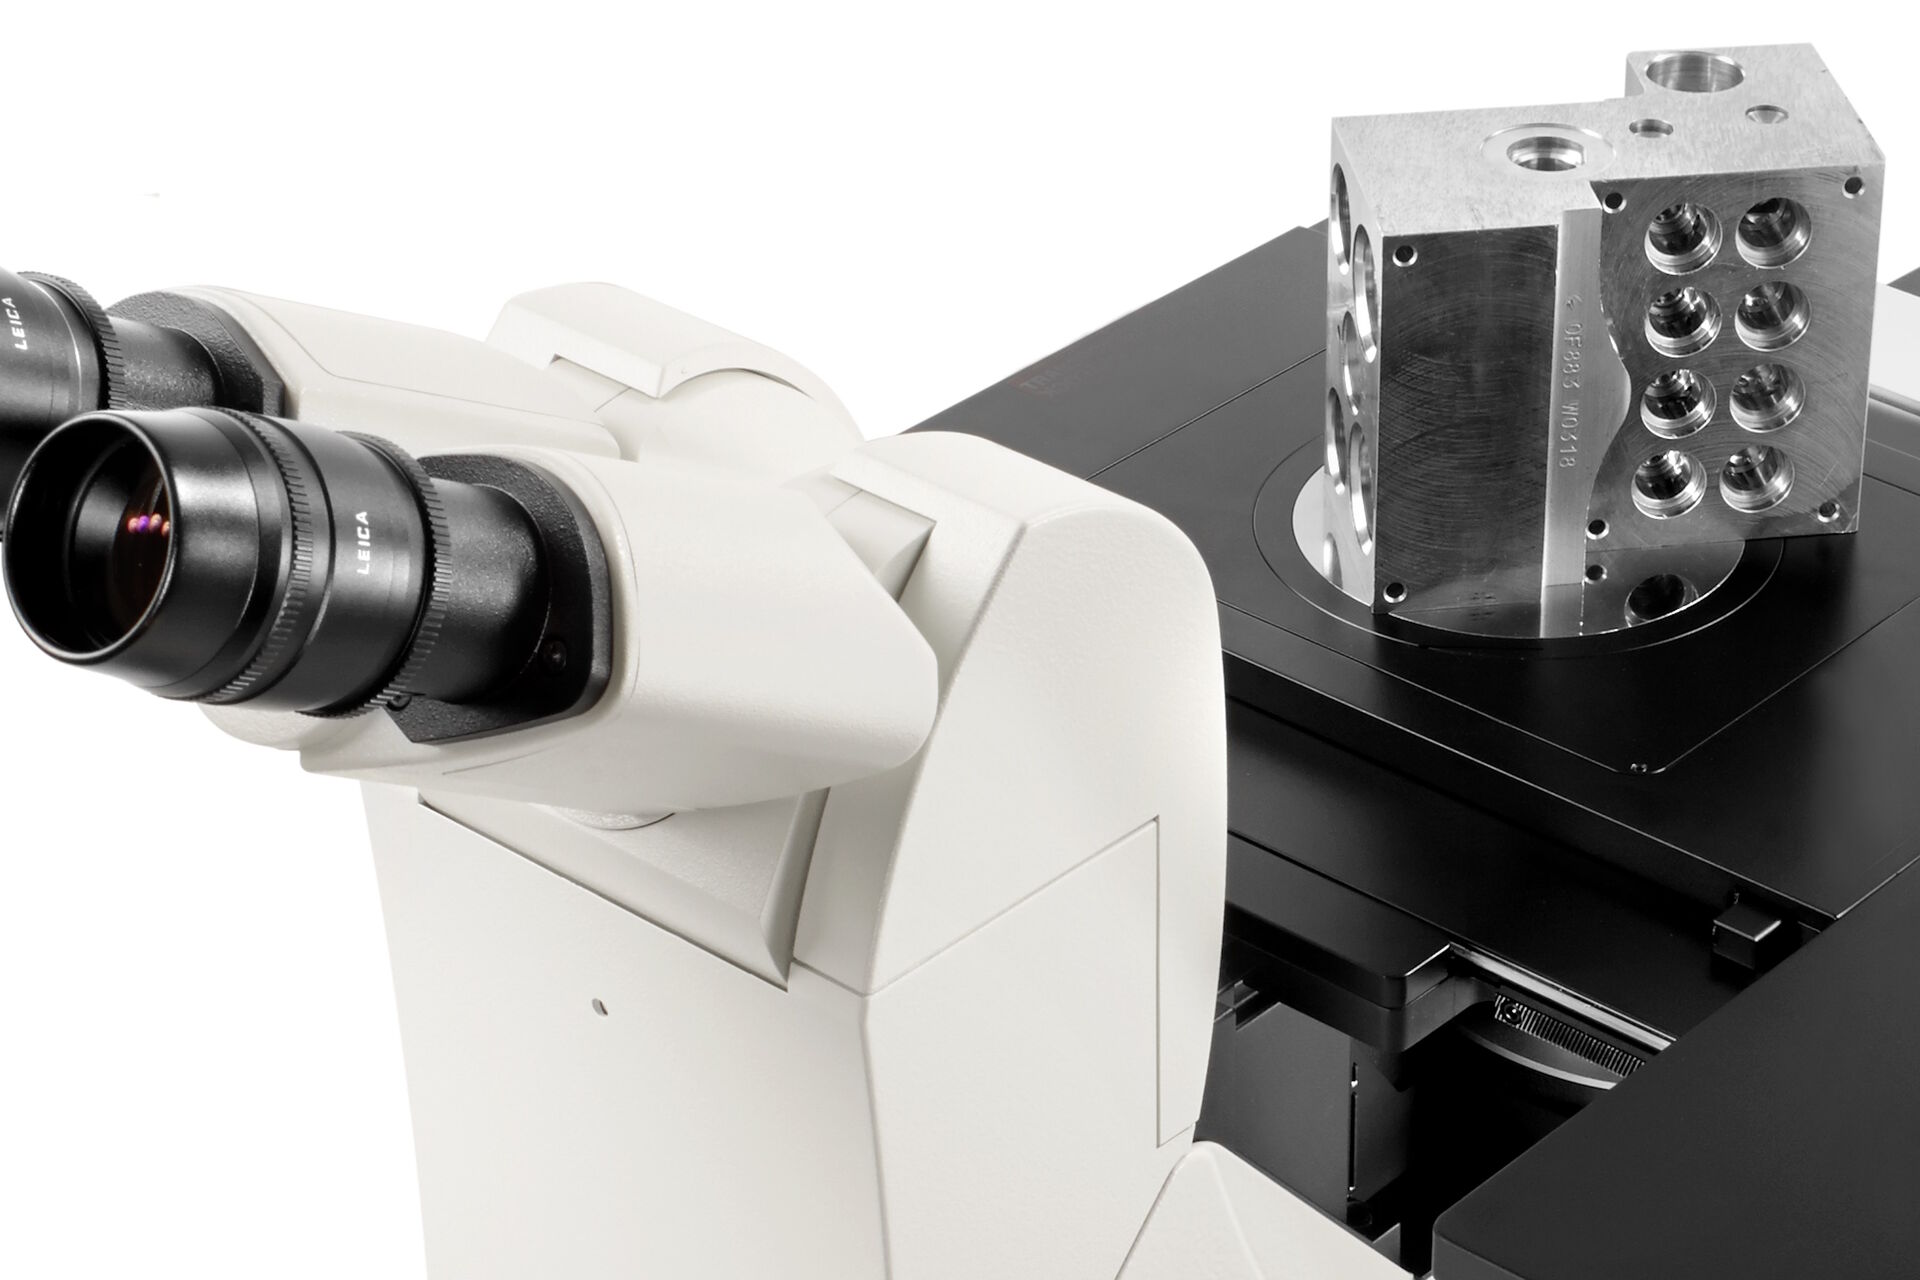
With inverted microscopes tall and heavy samples that weigh up to 30 kg can be observed. However, for upright microscopes, normally the sample height is limited to 80 mm and the weight to 3 kg, depending on the objective being used. Thus, users working with big and heavy samples, which may differ considerably in height, size, and weight, have more freedom with an inverted microscope.

2) Look at more samples in less time
With an inverted microscope, once a sample is placed on the stage and its surface is brought into focus, then it can be easily exchanged with all other samples, even if they differ greatly in height and size. With parfocal objectives, the sample surface stays in focus for all magnifications independent of the sample placed on the stage.
With an upright microscope, for samples which differ greatly in height and size, users often need to cut off a smaller piece from the large object to use as a sample and then mount/embed it in resin. If both sides of a mounted (resin-embedded) sample are not closely parallel and the goal is to search over a large area of the prepared sample surface with the microscope, then some refocusing may be required at times, depending on the magnification. Because it is advantageous that the surface stays in focus as the sample is moved laterally around on the microscope stage, then to achieve this goal:
- the sample must be placed on a holder with a putty- or clay-like material where the prepared surface is up;
- the prepared surface must be covered with a clean lint-free paper or cloth, so it does not get dirty; and
- then the sample surface must be leveled with a press.
So clearly much more time is required to observe multiple samples, especially if they have to be mounted in resin. For inexperienced users, changing of samples which vary in height on an upright microscope can be challenging until they become accustomed to it.
Even for an experienced user operating an upright microscope who can change samples relatively quickly, assuming only 5 seconds per step, still using an inverted microscope would be overall much faster. In table 1 below, an example involving observation of multiple samples and which compares working with an upright versus an inverted microscope, such as the DMi8, is shown.
| Action | Upright | Inverted | ||
|---|---|---|---|---|
| Step(s) | Total(s) | Step(s) | Total(s) | |
| Lower the stage | 5 | 5 | - | - |
| Move the stage to access sample | 5 | 10 | - | - |
| Remove sample from holder and take new sample | 5 | 15 | - | - |
| Place new sample on holder and cover prepared surface | 5 | 20 | - | - |
| Use a press to level the sample surface on holder | 5 | 25 | - | - |
| Change to lower magnification | 5 | 30 | 5 | 5 |
| Place new sample on stage | 5 | 35 | 5 | 10 |
| Refocus | 5 | 40 | - | 10 |
Table 1: Comparison of steps for preparing and changing tall, large samples for both upright and inverted microscopes. N.B.: The time needed for mounting the sample in resin, grinding and polishing of the sample surface, and searching the surface for areas of interest with the microscope are excluded here.
According to this example, observation with an inverted microscope allows users to prepare and change multiple samples up to 4 times faster compared to an upright microscope, so higher throughputs can be easily reached with an inverted microscope.
3) Objective lens cannot touch the sample
When using an upright microscope, bumping an objective into the sample is a well-known risk that can happen by accident. At times, the objective may be seriously damaged and then there is an unexpected need to invest in a new objective. Also, the sample may be damaged, requiring further preparation or even that it must be discarded. In most cases, spare objectives are not immediately available and must be ordered. Without an objective replacement or additional microscope, this trouble results in reduced sample throughput and, in the worst case, a complete interruption of work.
The design of the inverted microscope helps to reduce greatly the risk of the objective lens hitting the sample. First, the objective is placed under the stage. Second, microscopes such as the DMi8, have an up focus-stop feature that provides additional safety by defining the upper limit of the objective holder. So, users can focus on the tasks without spending time worrying about possible damage to the microscope optics and samples.
4) Save time and money concerning sample preparation
Less sample preparation is required for an inverted microscope, because only one side of the sample needs to be flat for observation and the sample can be very tall, large, and heavy (refer to figure 1). Users save time as there is no need cut out smaller pieces from bigger objects and embed these in a resin (refer to figure 2). As the entire sample surface remains in focus when the sample is moved laterally around on the microscope stage, there is no need to level the sample using a sample press. There are clearly fewer sample preparation steps with an inverted microscope which save time and money.

5) See via the eyepieces that things move in the same direction as without them
If you observe a sample with an upright microscope, your brain has some extra work to do: When you move the sample or stage to the left or the right, the image of the sample that you see through the eyepieces moves the opposite way, i.e. right or left, due to the design and light path of the microscope.
If you observe a sample with an inverted microscope, such as the DMi8, the movement of the sample and its image are always in the same direction. It behaves the same way as when you observe the world without a microscope. Especially for low-experience users, this fact is a big help for their work, because they do not have to think carefully about the direction in which they want to move the sample, but just do it. So, it saves users time and speeds up their workflow.
N.B.: With many upright microscopes, there is usually a higher-cost option to install an eyepiece tube with special optics that can invert the image of the sample, so it is in the same orientation as the sample on the stage. Additionally, the use of a digital camera with any microscope allows the sample image to be observed on a monitor and the image orientation can be easily changed to the same as the sample with the imaging software.
Related Articles
-

Battery Particle Detection During the Production Process
How battery particle detection and analysis is enhanced with optical microscopy and laser…
Apr 03, 2024Read article -

Key Factors for Efficient Cleanliness Analysis
An overview of the key factors necessary for technical cleanliness and efficient cleanliness…
Jan 03, 2024Read article -

Cross-section Analysis for Electronics Manufacturing
This article describes cross-section analysis for electronics concerning quality control and failure…
Nov 27, 2023Read article