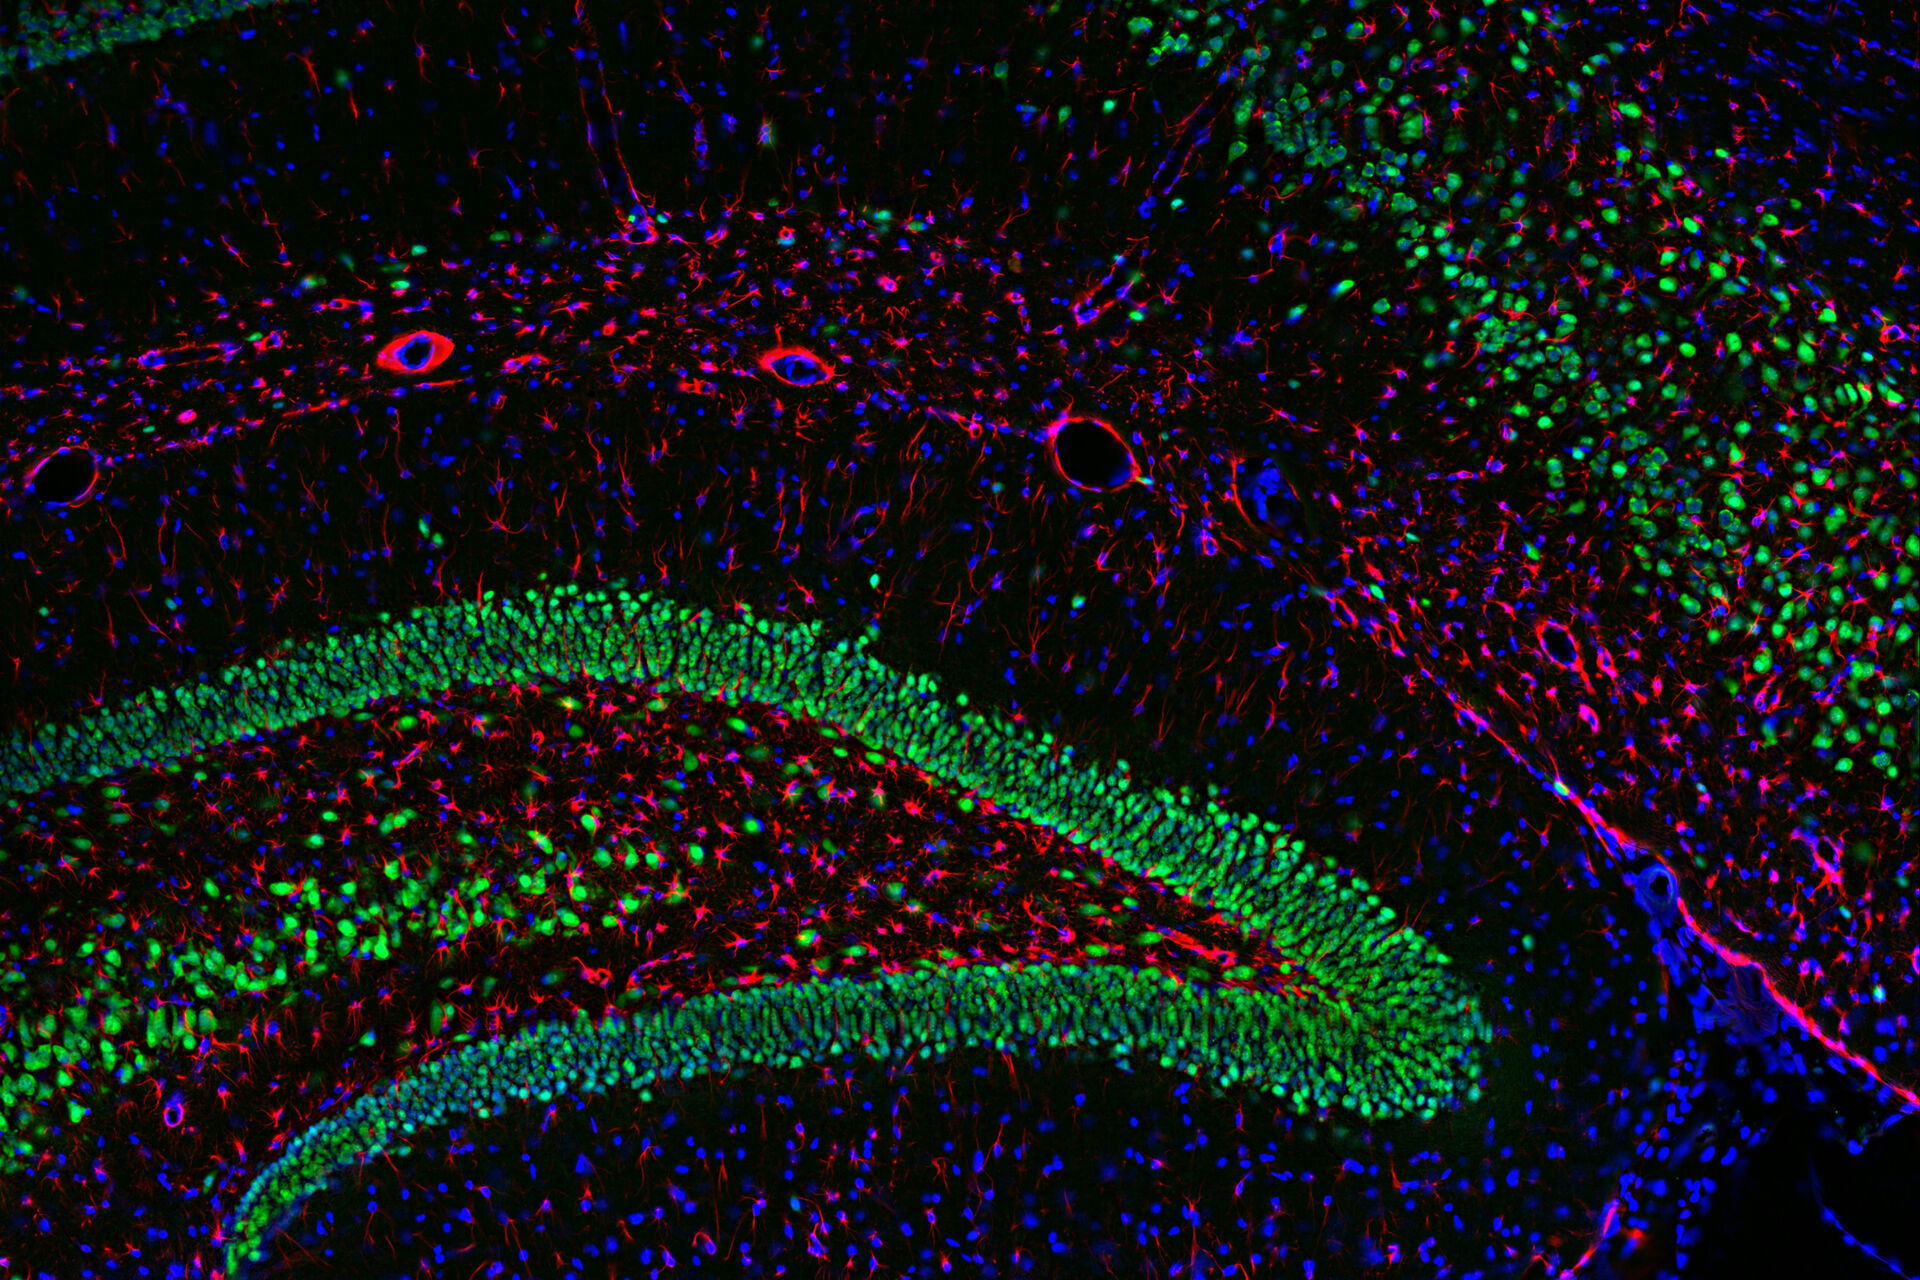
, Astrocytes (GFAP, red), Nuclei (DAPI, blue).")
Introduction
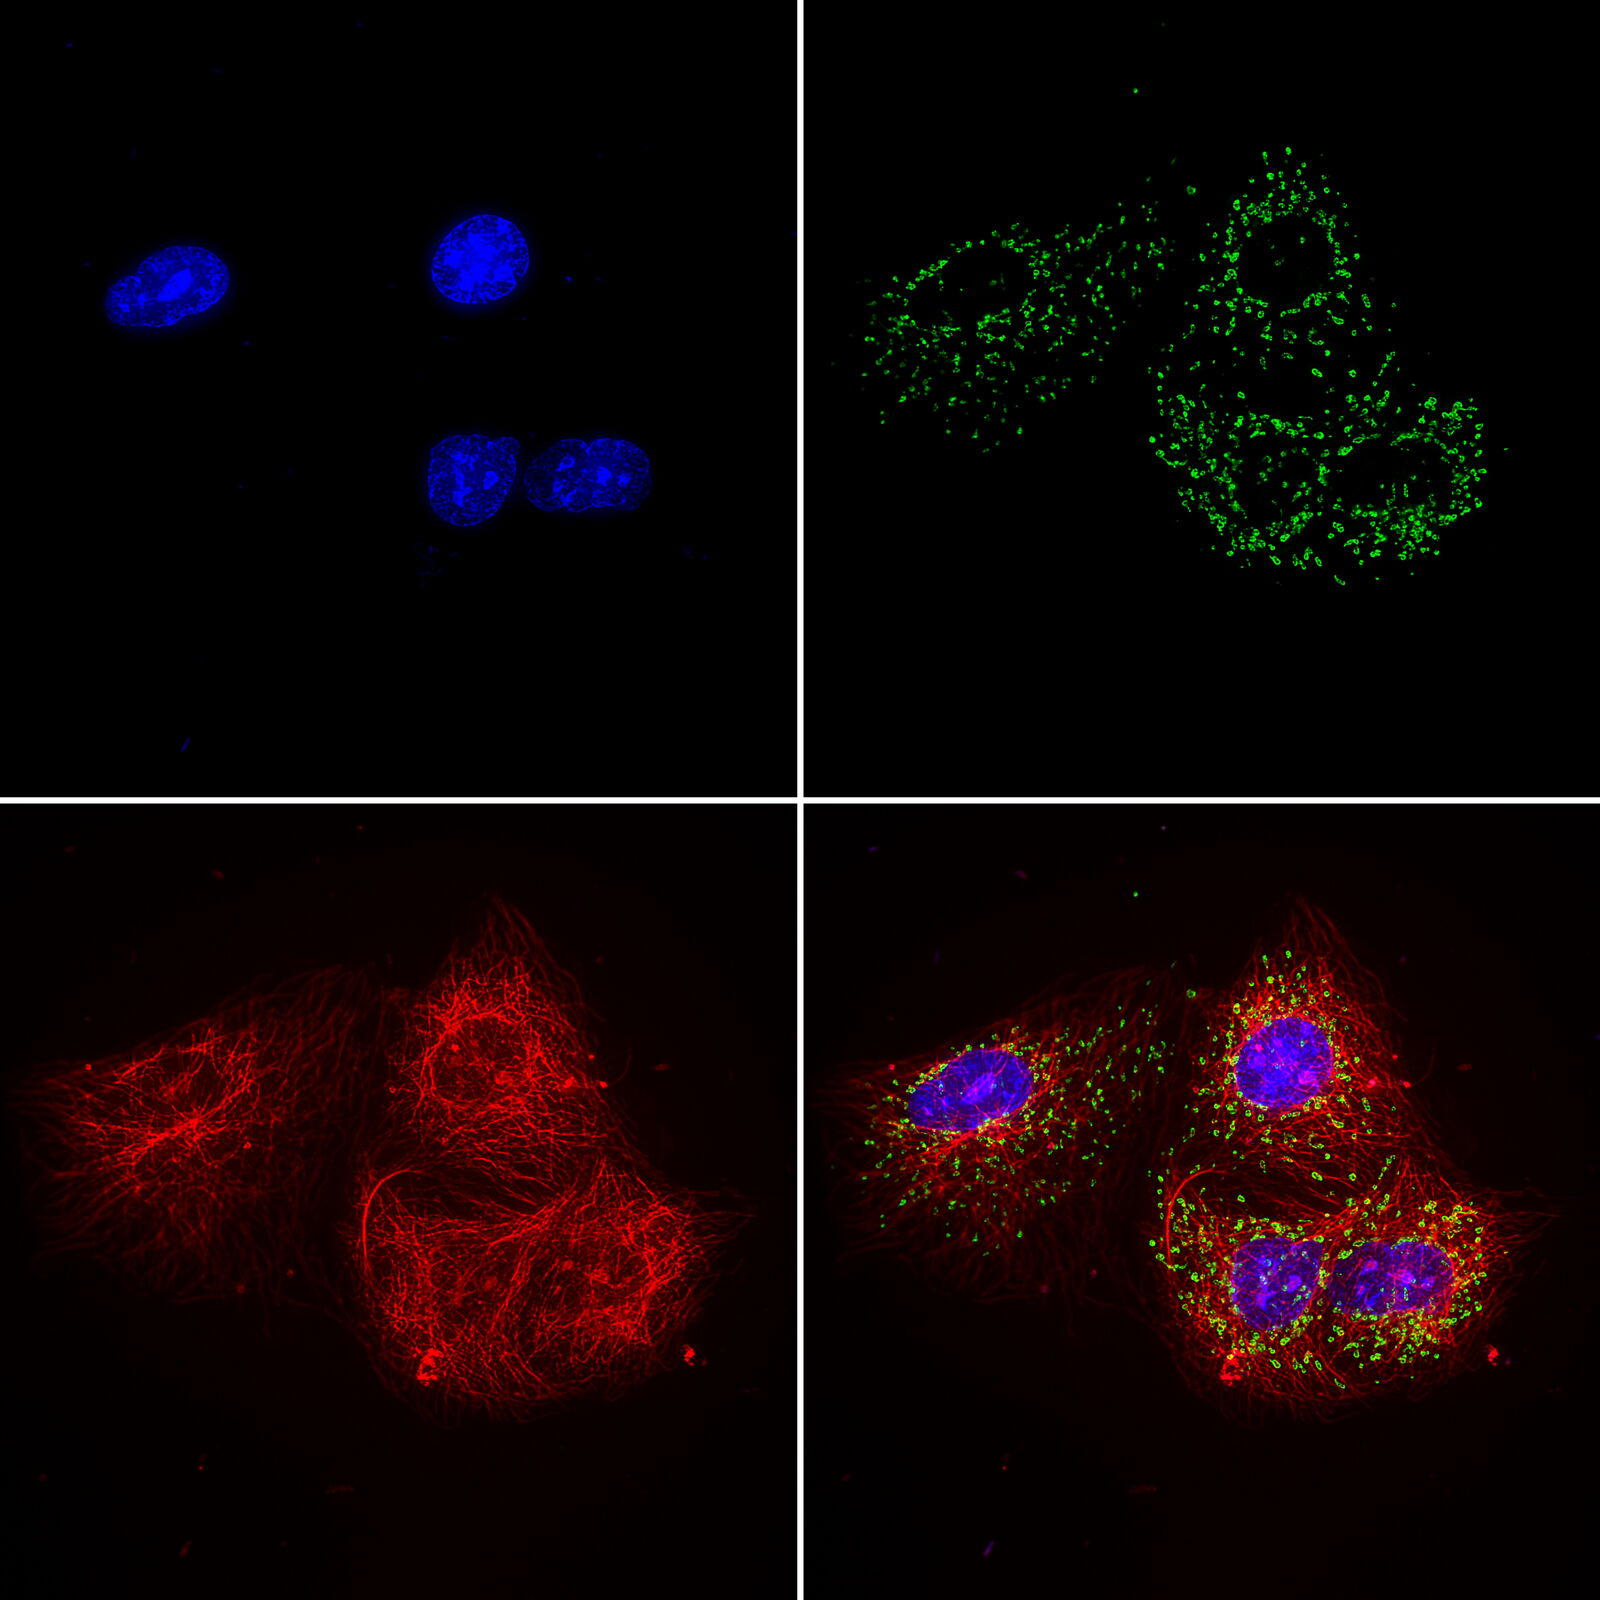
Multicolor or multiplex microscopy is commonly used in research to better characterize disease and gain a better understanding of biological processes. For example, in immuno-oncology, it is necessary to study the location of different immune cells relative to key biomarkers. In neuroscience, understanding the complexity of neuronal synapses often requires the study of multiple proteins. For the investigation of connectivity, it is important to clearly identify different types of neurons and their locations.
Multiplexing requires the use of multiple fluorophores to stain the various markers of interest. Choosing the right fluorophore combination for your experiment is critical. Each fluorophore has a characteristic emission spectrum which is the wavelength range in which it emits light. Most fluorophores have a broad emission spectrum, so when using two or more fluorophores, they might overlap, causing signal crosstalk. If crosstalk is not accounted for, the data can yield false negatives or positives or otherwise obscure data. Therefore, distinguishing between fluorophores is critical for achieving optimal results when multiplexing. In this article, some considerations for setting up a multicolor fluorescence experiment and avoiding major pitfalls are discussed in detail.
Selecting the right combination of fluorophores
Selecting the appropriate fluorophores for the labeling of your sample needs careful consideration, if you want to avoid crosstalk, ensure live-cell compatibility, and eliminate physiological side effects.
Although the number of fluorescent dyes available on the market has increased significantly, the issue of signal separation still remains. Consequently, choosing a labeling strategy is still complicated and setting up your experiment becomes even more complex as you add more and more fluorophores.
To avoid crosstalk, spectral separation requires the following considerations:
- the fluorophore excitation and emission spectra must match the system’s light source and filter set characteristics and
- the emission spectra of each fluorophore must have minimal overlap between the detection windows.
Capturing multiple fluorescence signals – How does it work?
As an example, consider the case of a typical widefield (often referred to by the ambiguous term “fluorescent microscopy”) multicolor experiment. Widefield fluorescence microscopes are often used due to their ease of operation and fast image acquisition. Each label in a widefield multicolor experiment is identified using dedicated sets of excitation and emission optical filters which ensure a high degree of specificity in obtaining individual signals from each fluorophore. Emission/excitation filters tend to be placed in separate filter wheels within the microscope. This setup already limits the fluorophores which can be chosen for an experiment. The fluorophores in your sample may not be compatible with the filters already installed in the microscope. Of course, the filter set cubes can be changed with other commercially available ones, but that process is often quite tedious.
Once fluorophores compatible with the available filters and light source have been selected and the sample is stained, the next step is setting up the system. First, the filters must be selected and then balanced to maximize signal detection and minimize crosstalk. Next, the filters need to be tuned so that the wavelength bandpass is restricted and the emission is centered around the peak wavelengths of the individual fluorophores. This step limits the detection of unwanted emission from other fluorophores.
Optical filters “decontaminate” the signal of an individual fluorophore by:
- minimizing the excitation of undesired fluorophores, i.e., those that are not compatible with the specific filter in use; and
- discarding signal contribution (light input) that does not match the peak emission of the desired fluorophore.
The chosen bandwidth of the detection windows determines how much undesired signal will be detected and how much of the desired light is discarded – a narrow bandwidth means higher specificity and lower efficiency, whereas a wide bandwidth results in lower specificity and higher efficiency. The greater the number of fluorophores used, the more complex this balancing act becomes. Ideally, each fluorophore combination requires an optimized set of filters to capture the maximum amount of emission intensity from each fluorophore while minimizing crosstalk between detection channels. Even when using this approach, emission from one fluorophore can still bleed into the detection channel intended for another. Thus, reduction of crosstalk by adjusting filters comes at the expense of the desired signal and may lead to loss of crucial data. All of this complicates the task of obtaining a good fluorescence image.
Another consideration is that the nature of this excitation/emission regime means each individual fluorophore must be imaged sequentially, i.e., using one optical filter after another, which implies added time for filter changes and acquisition. This must be repeated for each position, focal plane, and point in time, meaning it will take more and more time to acquire the complete image of a sample for each additional fluorophore. For experiments with live specimens, the time needed to switch from one fluorophore to another limits the capture rate, missing fast processes and reducing comparability between the colors.
Other approaches to avoid crosstalk during multiplexing experiments
Other approaches to eliminate crosstalk, such as performing linear unmixing after acquisition, can be used. For this, spectral imaging, the detection of multiple images each with different emission information, is a prerequisite [1]. Spectral imaging can be implemented in several ways on widefield or confocal microscopes. On a widefield fluorescence microscope, this operation usually involves dedicated filters and still requires sequential acquisition which is time consuming and makes it, due to the repetitive excitation, prone to photobleaching.
Linear unmixing analysis determines the relative contribution from each fluorophore for every pixel of the image by computationally decomposing the fluorescent elements of the measured signal and matching it to reference emission spectral profiles. Linear unmixing requires a priori knowledge of the fluorophore emission spectrum and often complex manual postprocessing plans are needed. Furthermore, this approach may be error prone for noisy images. Removing any signal not coming from the fluorophores by background subtraction is a must to avoid artifacts in the processed images. Also, because linear unmixing is a pixel-based method, it is susceptible to errors introduced into the original images or the reference spectra. Consequently, the presence of noise makes any potential errors of unmixed data increase in proportion to the spectral overlap of the fluorophores. This effect can compromise images taken with low light levels, such as when imaging live specimens.
Is there a better way to do it?
Recent innovations in the field of imaging include the adaption of a phasor analysis to spectral data [2]. Cutrale et al. [3] developed a potent method to unmix multiple fluorophores even in the low-noise regime without knowledge of the emission characteristics and the microscope’s transmission characteristics. It is fast and reliable and, in principle, capable of separating background signals, such as autofluorescence, and true individual signals.
Phasor-based analysis was originally conceived as a powerful method for visualizing fluorescence lifetime information and, more recently, has been adapted by Cutrale et al., to separate the spectral information in real-time and without the need of using reference spectra. The result is that fluorescent signals coming from spectral image acquisition are not only separated, but unwanted signals, such as autofluorescence, can be eliminated, improving the final outcome of your experiment. Additionally, the whole workflow of spectral imaging data analysis is simplified, as this it does not require the extensive calibration needed for other approaches such as linear unmixing.
Spectral phasor analysis allows rapid and reliable unmixing of fluorescence microscopy spectral images
Phasor analysis applied to spectral imaging is a published method that can be used to simplify and improve the accuracy of multiplex imaging experiments.
 and phalloidin (magenta), imaged using Viventis SCAPE; scale bar 50μm. Courtesy of Marina Cuenca and Heleen Jungen (Dayton lab), EMBL Barcelona.")