Introduction
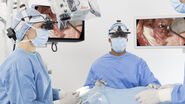
The surgical microscope has been a game-changer in microsurgery, as well as in my own specialty – ear, nose and throat ENT surgery – and more specifically in otologic procedures. Indeed, this is also true of other specialties, including neurosurgery, orthopedic spinal surgery, and plastic and reconstructive surgery. The structures of the middle and inner ear are not clearly visible to the naked eye, and require extreme care owing to their proximity to delicate anatomical regions. This requires the use of an enhanced visualization system, which is made possible thanks to microscopes that use advanced technology to augment the surgeon’s vision, improving working comfort and ensuring optimal precision.
Operating room nurses – key members of the operating team – are responsible for overseeing perioperative logistics. As such, they have an important role to play in operating the surgical microscope. They are responsible for starting up the microscope, maneuvering it during the microsurgery procedure and overseeing its post-operative processes.
This guide aims to provide essential information to enable operating room nurses to independently manage the various parameters, processes and techniques required to guarantee safe use of the surgical microscope.
Microsurgery
Microsurgery refers to all surgical procedures that cannot be carried out with the naked eye. It requires vision-enhancing systems that magnify the surgical site: surgical microscope, binocular loupe, camera, etc.
A microscope was first used to carry out a surgical procedure back in 1921. This was a simple monocular tube fixed directly to the patient during an otologic procedure. The introduction of an effective optical magnifying system in the surgical field opened up numerous avenues for progress, and
was a major step forward for microsurgery.
Advances in microsurgery techniques brought benefits to many fields of application: ENT surgery, neurosurgery, ophthalmic surgery, hand surgery, vascular surgery and plastic surgery. The indications in ENT surgery are boundless: tympanoplasty, fitting cochlear implants, otosclerosis, ossiculoplasty, fitting transtympanic ventilation tubes, etc. This type of surgery deals with particularly small anatomical structures which are difficult to see without a microscope. A clear example: the stapes in an adult male measures between 3 and 4 mm and can be cut using a 0.5 mm drill.
By using a surgical microscope, the surgeon can maintain a good posture with the back straight and the head in line with the spine throughout the microsurgery procedure, which in some cases can be several hours long. This makes for a more ergonomic procedure and ensures precision in the surgeon’s movements, as well as preventing musculoskeletal problems to which surgeons may be susceptible. The ideal working position depends on a number of parameters: positioning of the device, seat height, operating table height. The assistant must then find his or her best working position by adjusting the seat height (only relevant parameter for the assistant). Height-adjustable stools are therefore essential for microsurgery procedures.
Getting to know the surgical microscope
Before using the microscope, it is important to consider the factors that affect how an operating room nurse will be required to use this equipment. There are different brands, sizes, models and technologies available. The microscopes used in ENT surgery are different to ophthalmic microscopes. In ophthalmic surgery, the light emitted by the microscope is less bright and filtered to protect the eyes against infrared and ultraviolet radiation. However, there are certain features that are identical across all devices.
Microscope anatomy
Definition of a surgical microscope: a medical viewing device used during an examination or surgical procedure to provide a high-resolution stereoscopic (three-dimensional) image of small structures using a zoom function and adjustable lighting. According to Mallet, the principle behind a microscope is as follows: “the lens of a microscope forms an enlarged image of the object (known as an intermediate image) in a tube, illuminated by a lamp. This image is then magnified by an eyepiece”1. Definition of the focal length: the working distance between the focusing lens and the surgical site is a variable which must be predefined before each surgical intervention. It must be configured to obtain a high-quality image and ensure comfortable working conditions for operators.
Components of the microscope:
- Optical system: Assistant’s +/–
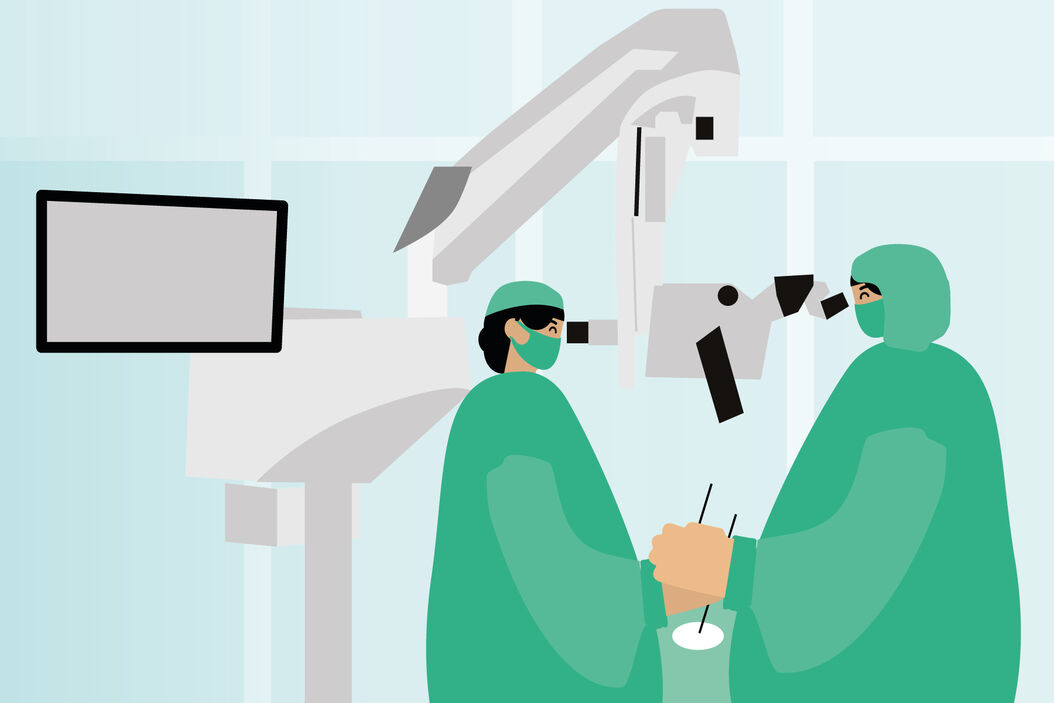
- Assistant’s +/– binocular tube: this is the distal part of the microscope which is closest to the surgeon. The assistant’s binocular tube can be positioned either opposite or next to the main tube. Its position depends on the surgical procedure, however it is often more practical to have the assistant alongside the main operator during otologic surgery.
- Zoom for adjusting the magnification
- Focusing lens: this is used to focus the image on the object plane at a given working distance. The focusing lens on a surgical microscope is usually fixed such as in Ophthalmic surgery, unlike on an examination microscope, which has interchangeable lenses. Surgical microscopes in Microsurgery have a multifocal lens which is continuously adjustable between 200 and 600 mm.
- Optical head: usually equipped with handles used to direct the lens and make most of the adjustments.
: 1. Main/surgeon’s binocular tube, 2. Joystick handles, 3. Focusing lens, 4. Assistant’s inocular tube. Assistant opposite (right): 5. Assistant’s binocular tube.")
- Stand: comprising a suspension arm, a column and a mobile base on casters, equipped with a stabilizing device (brakes).
- The microscope column includes a control panel featuring all the adjustable parameters (magnification, focal length, etc.) as well as information on using the device (bulb life, errors, etc.).
- The stand is mobile to allow the optical system to be moved during the procedure depending on the different operating times, while ensuring comfortable working conditions for the surgeon. Some microscopes are equipped with electromagnetic brakes which can be released using handles.
. Suspension arm movement (middle). Control panel (right).")
Microscopes may be equipped with different lighting systems:
- Halogen bulbs: these are incandescent bulbs filled with pressurized halogenated gases. The low power and artificial color of halogen light have led to the gradual phasing out of the system in favor of more efficient bulbs. These are less expensive.
- Xenon bulbs: these bulbs emit an intense light whose warmth is similar to that of natural light. It is more expensive and produces a higher calorific value (the light can cause burn-type injuries if it is too intense and focused for too long on a single point).
- LED bulbs: this type of lighting is even less common, but most likely represents the future. LED bulbs have a much longer service life (around 60,000 hours), which makes them more cost-effective.
- Automatic light intensity optimization: BrightCare and BrightCare Plus (Leica features) automatically optimize light intensity relative to the working distance to minimize incidents of patient burns.
Microscope settings
Microscopic vision is a type of binocular vision that detects both distance and relief. Microscopic vision requires a certain configuration to enable the surgeon to adjust to the distance between himself and an object and view it very clearly. The following parameters allow the microscope to be focused to produce a clear and comfortably visible image:
- Adjustment parameters:
- Zoom: this is the main function that enables the operator to obtain a magnified image of a very small anatomical structure. The greater the zoom, the smaller the field of vision but the more detailed the view through the lens.
- Focal length
- Brightness: the lighting capacity of a microscope is very important, and the brightness does not always need to be set high. It is recommended to begin the procedure with the brightness set to 15% and increase it in stages as required by the surgeon.
- Operator parameters:
- Pupillary distance: the binocular tube can be adjusted to suit the operator’s body shape, and the two eyepieces can be moved apart on a scale from approximately 50 to 70 mm so that the pupil of each eye is perfectly aligned with each tube.
- Diopter adjustment: this is done by moving the adjustment ring on the eyepiece or the tube that houses the eyepiece. This setting is used to adjust the focus to compensate for any visual differences between the operator’s eyes.
- Parfocality: Parfocal microscope objectives stay in focus when magnification is changed. This is done by placing a flat test object with sharp contours under the objective at working distance, then zooming through the whole range, observing the test object. The image sharpness must remain constant at all magnifications. If this is not the case, check diopter settings of the eyepieces.
 and settings for the surgeon’s or assistant’s operating parameters (right).")
Special cases
Connecting to a video acquisition system
It is now vital to be able to store images obtained during the procedure; this traceability is important for different reasons:
- Patient follow-up: it is useful to be able to compare images obtained during different procedures to monitor any changes.
- Educational: images taken during surgical procedures feed presentations that can be used for student training or to help patients better understand their condition.
- Legal: in case of a dispute between the surgeon and the patient, the images obtained constitute valuable evidence that may be used in the surgeon’s defense, where necessary.
- Scientific research and publication.
The recording systems may be either outside the microscope or, increasingly, integrated in the device: the acquisition camera may be installed in the optical system or embedded in the device. In the first case, particular care should be taken to prevent changes that may be caused by an impact or
incorrect positioning.
The images obtained can be exported in different ways:
- Recorder integrated in the microscope: the microscope’s integrated hard drive is used to store the desired sessions. The videos can then be stored on an external storage device (hard drive, USB key, CD, etc.) or uploaded to a computer network (via connection or WiFi to PACS or DICOM).
- Recorder external to the microscope: an intermediate unit can be used to convert image formats. The microscope can be connected to a recording system via this unit, allowing the operator to select the parts of the surgical procedure he or she wishes to compile.

What makes a good microscope?
What do we want from a surgical microscope? What are the criteria that enable us to ascertain that a microscope effectively meets the needs of the surgical team and, more generally, those of healthcare institutions?
Firstly, it is important to ensure that the surgical microscope conforms to the regulations, i.e. that it bears a CE mark. Other criteria are used to distinguish between devices in order to select the one that meets the necessary requirements:
- Excellent optical quality that gives the operator a perfect view during the procedure. Visual comfort prevents asthenopia (eye strain) and guarantees precise movements.
- Real user comfort, both in terms of handling and ergonomics (balancing, movement, etc.).
- Recording technology used to store intraoperative images for the purposes of traceability, education, medical/legal documentation or research.
- Automatic Brightness Adjustment
- Specific, customizable assistance
- Scalable and upgradeable to adapt the microscope to the actions for which it is or will be intended: fluorescence, image injection, etc.
- Affordable
This information is used to create an accurate picture of the microscope’s use and ensure the operator is properly prepared.
Operations and checks to be performed by the operating room nurse
The operating room nurse must take particular care when handling the surgical microscope in the operating room. Correct operation of the device is vital to guarantee a smooth surgical procedure for the patient.
The role of the operating room nurse is regulated. Please refer to the local legislation for more information on your responsibilities.
The operating room nurse is involved in an executive and supervisory capacity throughout the various stages of the surgical procedure.
Disclaimer: The following recommendations are general, and are not a substitute for the appropriate training or the instructions provided by the manufacturer in the microscope’s user manual.
Before any surgical procedure
Before the procedure (i.e. before entering the patient’s room or when opening the operating room), certain checks are required to avoid problems and/or time-consuming adjustments during the schedule of operations:
- Removing the protective cover: it is important to cover the microscope between two operating procedures to protect the optical system from dust suspended in the air and any shocks to which it may be subjected.
- The various cased sections should be wiped with a damp cloth to remove any dust, which may contain pathogens.
- Checking the cleanliness of the eyepieces: residue may be visible due to the detergents used. A dry, non-woven pad may be used to remove most of this. Detergents should not be used as this can damage the optical surfaces. If this is not sufficient, an air jet may be used to remove any dust. You may also contact the hospital’s biomedical department for a deeper clean in accordance with the manufacturer’s guidelines.
- Positioning: the device must be positioned so that it can be easily moved close to the operators without causing an obstruction during the pre-procedure steps: patient transportation, installation, anesthetic induction, etc. Its position should be precisely determined to enable the best electrical socket to be selected depending on the geographic layout.
- Powering on: once these checks have been performed, the device can be connected to the mains ready for powering on. Where possible, an uninterruptible power supply socket should be used. This protects the microscope against sudden shutdowns and damage to the bulb following a mains power outage. Indicator lights show that the microscope can be powered on. Press the ON button but do not touch the microscope until all the self-tests have been completed (on the most recent microscopes, a digital screen shows the progress of the various steps).
- Checking the bulb service life: the bulb service life is predefined depending on its type. While it may exceed this service life, it is not advisable to continue using it for too long. Please replace in accordance with the schedule. The microscope has two bulbs: the second (backup) bulb allows the surgical procedure to continue if the first bulb fails. To replace the bulb, please refer to the “Tips and advice” section.
- Lateral positioning: the surgeon’s position depends on the surgical site. During otologic surgery, the main operator will be positioned on the side of the affected ear and the assistant will be near the patient’s head. The assistant’s binocular tube must therefore be positioned on the correct side of the optical system. Great care must be taken during this step to prevent the tube from falling, as it is very fragile. When the video acquisition system is external to the microscope, the camera may be interchangeable with the assistant’s tube, depending on the device.
- Checking the stability of the different microscope components: by suspending the microscope, the operating room nurse can detect any signs of collapse that may indicate a problem with the electromagnetic brakes. On some microscopes, the hardness of the brakes can be adjusted using knobs. If this is not possible, please contact the maintenance technician and refrain from using the microscope on the patient, as the optical system could fall onto the patient during the procedure and cause serious injury or damage.
- Balancing: if the microscope is laterally positioned, the loads are distributed differently. This can be rectified using a belt and pulley system to locate a neutral center of gravity. Doing this prevents the optical system from overbalancing when the electromagnetic brakes are released. On the oldest microscopes, balancing can be performed manually using the knobs to adjust the different spatial planes: x, y and z. Modern surgical microscopes are self-balancing: this step should be performed in a space large enough to enable the stand to move automatically without the risk of impacts. Be aware of the pressure that can be exerted by the handles.
- Covering: It is recommended that the optical system and the suspension arm be protected with a cover (or at least a cover over the handles) throughout the surgical procedure. The benefits of this are twofold:
- The cover is sterile to maintain aseptic conditions at the surgical site. The covering technique is therefore crucial in preventing contamination (see covering section).
- The cover is impermeable to create a waterproof barrier and protect against the projection of organic or biological fluids during the surgical procedure.

The body of the microscope must not be covered unless absolutely necessary. It is preferable to use an adhesive drape to form a barrier covering the surface closest to the patient. This section has air vents, which can damage the lighting system by overheating if the device is not sufficiently ventilated.
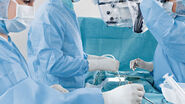
During the procedure
- The surgeon must be able to select the right instrument at the right time, without restriction or interruption. The position of the scrub nurse is therefore crucial in terms of the surgical ergonomics. Ideally, the scrub nurse should be opposite the main operator to enable her to hand instruments
to the surgeon without interrupting the latter. Repeatedly switching between normal vision and microscopic vision can result in eye strain. - Between microsurgery steps, and when the microscope is not required, the circulating nurse can set the microscope’s light to standby to preserve the bulb’s service life, prevent overheating of the device or reduce noise from the ventilation. The nurse may move the device away from the surgical
site to maintain aseptic conditions and prevent it from obstructing the surgical lighting. - Take care when moving around close to the microscope: even brushing against the body of the microscope can cause vibrations which, when amplified, can affect the optical system and cause serious problems during the surgical procedure. As a precaution, during microsurgery, the brake at the base of the microscope must be applied.
After the procedure
- Once the sterile cover has been removed, the operating room nurse and/or the assistant nurse performs biocleaning of the medical equipment based on the same recommendations as those applicable to the preoperative procedure.
- Before disconnecting the microscope, the operating room nurse must place it in the storage position: this makes the device more compact and protects the optical system against shocks. It is then easier to remove the device from the room to enable final biocleaning of the room or pooling with another operating room. Most breakages occur during storage, therefore it is vital to follow this process to ensure the microscope remains serviceable.
- The device can be disconnected: hold the power cable at its furthest point to prevent damage to the cable.
- It is not recommended to move the microscope until the bulb has cooled completely. The bulb is more susceptible to breakage when hot. This applies in particular to microscopes with halogen bulbs, and is no longer essential for microscopes with LED bulbs.
- Periodic surface sampling should be performed by hygiene technicians to ensure that no bacterial or fungal contamination has formed on the surgical microscope. Preferred interval: quarterly.

Tips and advice
Replacing a bulb: the main wear part on a surgical microscope is the bulb. It should be replaced after a predefined period of use, or when it no longer works as intended (breakage, loss of efficiency, etc.). On the most recent devices, the bulb is part of an electronic unit that must be replaced in its entirety. The operating room nurse must take particular care when performing this operation. Never replace a bulb immediately after using the microscope; it may still be hot and there is a serious risk of burns. Most importantly, make sure that the bulb is compatible, in accordance with the manufacturer’s recommendations. The defective bulb should be swapped with the backup bulb to make it accessible: depending on the microscope, a pull tab can be used to switch on either of the available bulbs via a rotary motion. Do not touch the surface of the new bulb with your fingers, as the natural film of oil on the fingertips can result in overheating when the bulb is switched on. This can cause the glass to become opaque, reducing the brightness or even resulting in breakage of the bulb.
If the bulbs have been swapped, the defective bulb can be returned to the manufacturer for recycling.
- Remember to ask the department heath executive to order a new replacement bulb and to reset the hour counter on the new bulb in the microscope’s maintenance menu.
- Covering technique: it is not always easy to cover the microscope without compromising the aseptic conditions. The handling precautions should be scrupulously observed to ensure that this barrier is effectively created:
- Dressed in sterile clothing, the scrub nurse takes the sterile cover from the circulating nurse. The scrub nurse should then carefully unfold it on the instrument table. Ideally, owing to the size of the cover, this step should be performed before the other medical/surgical instruments are distributed to prevent instruments from being knocked off. At the same time, the circulating nurse prepares the microscope by sufficiently unfolding it and positioning the optical system 1.5 meters from the floor.
- With the various sheets laid flat, locate the one that contains the cap used to protect the lens. Without unfolding the cover further, the operating room nurse holds the cap with his or her dominant hand and slides the other hand into the same fold.
- Maintaining a sufficient distance between the arms to prevent it from touching the floor, the operating room nurse lifts the cover arranged over his or her forearms, with the lens cap held outwards.
- The nurse can then clip it onto the lens. The circulating nurse should assist with unfolding the cover: he or she should stand near the microscope’s column and place his or her hands on the inside of the cover.
- The cover should be gradually unfolded, one sheet at a time, until the entire optical system and part of the suspension arm are covered. The circulating nurse can then affix the end section of the microscope (a knot will prevent the cover from sliding during use).
- The operating room nurse, in sterile clothing, should then insert the binocular tubes into the appropriate openings and adjust them using Velcro or adhesive tape. Adhesive straps are affixed along the length of the cover to allow the cover to be adjusted to the microscope. The scrub nurse can then release the eyepieces by removing the section of cover protecting them. The final step is to change the gloves to avoid the risk of contamination.
- Maintenance: generally speaking, a medical/surgical device should be inspected annually by qualified professionals. A maintenance contract can be negotiated to enable preventive maintenance and repairs to be performed.
Conclusion
Operating room nurses are vital to the surgery process. As such, it is essential that they acquire in-depth knowledge and expertise in operating surgical microscopes. This will ensure that procedures are safe, effective and more comfortable for the entire team.
It is also important to create forums for operating room nurses to share experiences and practical information on surgical microscopes. These exchanges will foster the adoption and passing on of best practices, for the correct and optimal use of microscopes across the board.
Disclaimer: The statements and explanations of the healthcare professional in this guide reflect only his opinion and personal experience. They do not necessarily reflect the opinion of any institution with whom he is affiliated.