Why are digital microscopes relevant for the automotive industry?
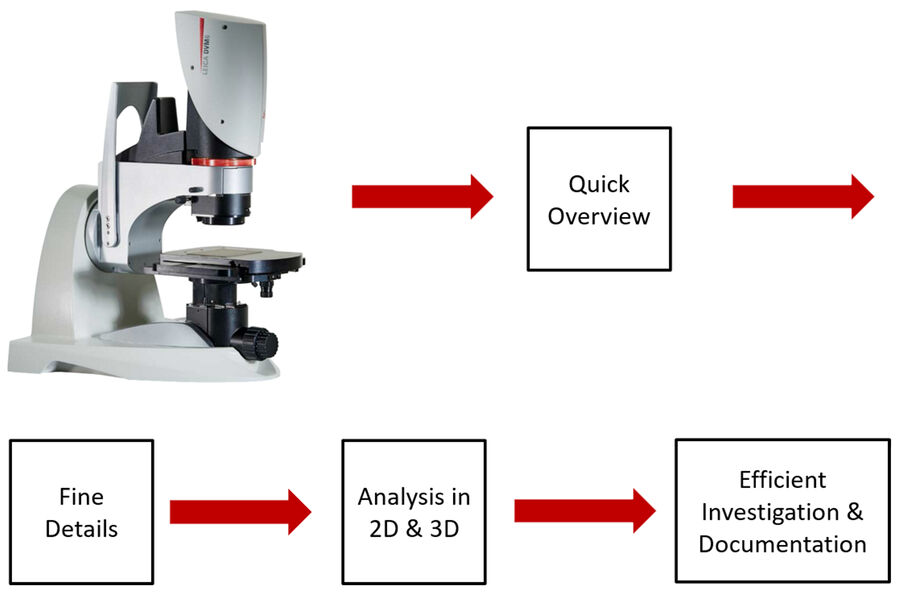
Digital microscopes are optical microscopes without eyepieces which display the image directly on a monitor [4]. They enable suppliers and manufacturers to do investigation fast and share and communicate findings efficiently with each other, especially when current components are changed or new ones introduced.
They also facilitate the easy documentation of results and creation of reports which can be referred to at a later time if the need arises. Digital microscopes are versatile and can be used for the investigation of diverse materials, from bigger, less sophisticated parts, such as tires and interior panels, to smaller, more complex, multi-component parts like PCBs (printed-circuit boards) and microelectronic chips [5]. These attributes of a digital microscope allow an efficient workflow for investigation and documentation [6,7].
Investigation and documentation with a digital microscope
Why are investigation and documentation efficient with a digital microscope? Here are some reasons:
- Go quickly from an overview to fine detail due to powerful lateral (XY) image stitching and a simple way to change magnification over the entire range (these videos on overview and mag change demonstrate how easy it is);
- Versatile illumination to see a part’s diverse characteristics using the fully integrated ring and coaxial light [5];
- Save time with fast recall of imaging parameters thanks to the microscope encoding;
- Users need little training and experience to operate the microscope [7];
- View a part from multiple perspectives due to the fast microscope head tilting and sample stage rotation (to see how it is done, watch this video on tilting and rotation) [7];
- Multiple users can easily operate the microscope for a variety of applications;
- Obtain comparable results no matter the microscope user thanks to the encoding and easy report generation.
Automotive parts examined with a digital microscope
Clutch disc
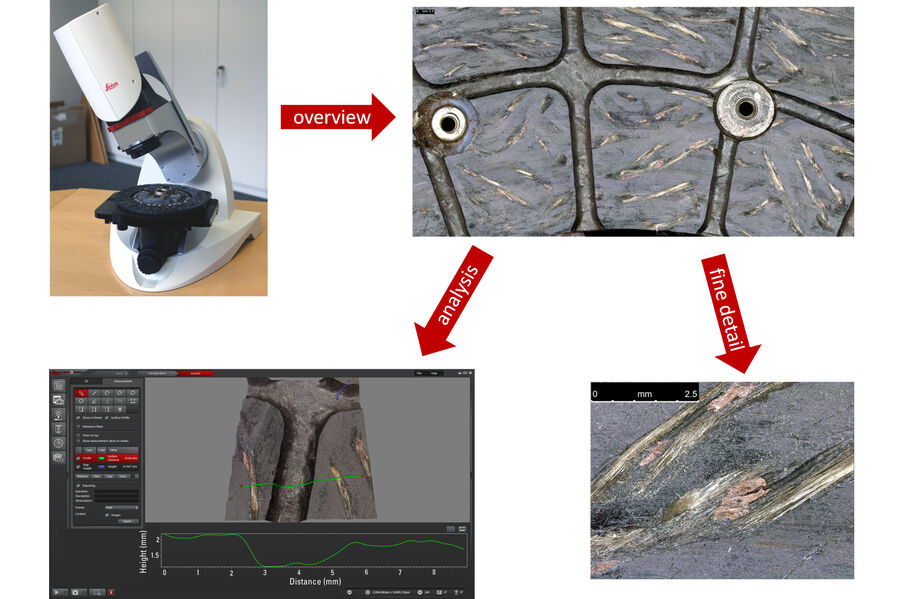
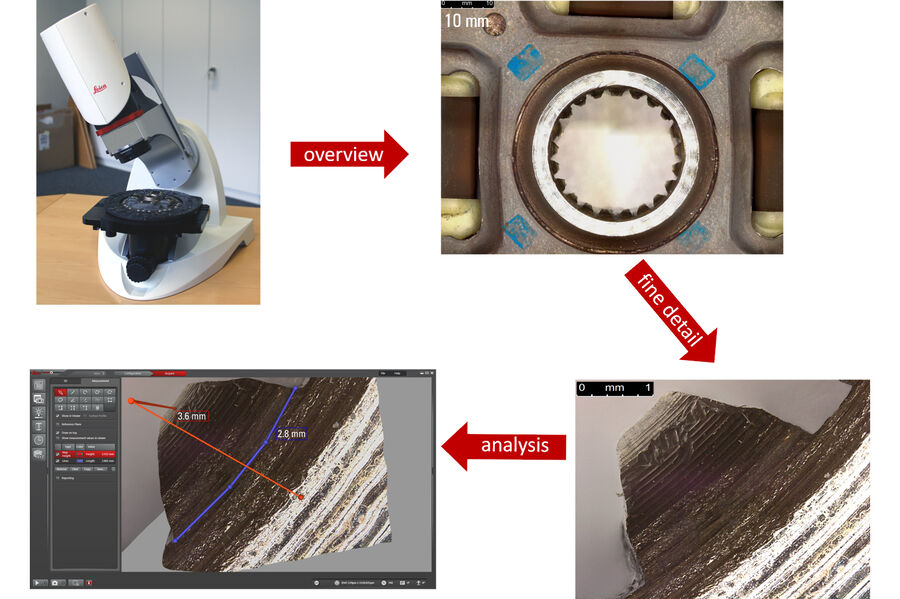
The clutch disc of an automobile was examined and below are images (going from overview to fine detail and analysis) of the friction surface and the splined hub of the disc.
Clutch friction surface
Clutch splined hub
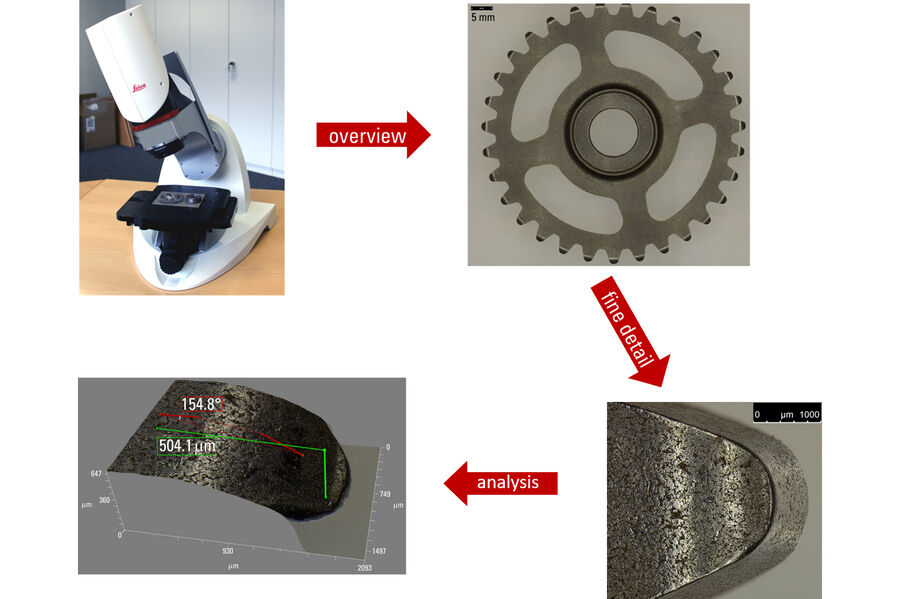
Gear
The gear of an automobile engine was also analyzed and below are images (from overview to fine detail and analysis) of the gear and its teeth.
Automobile body metal plate
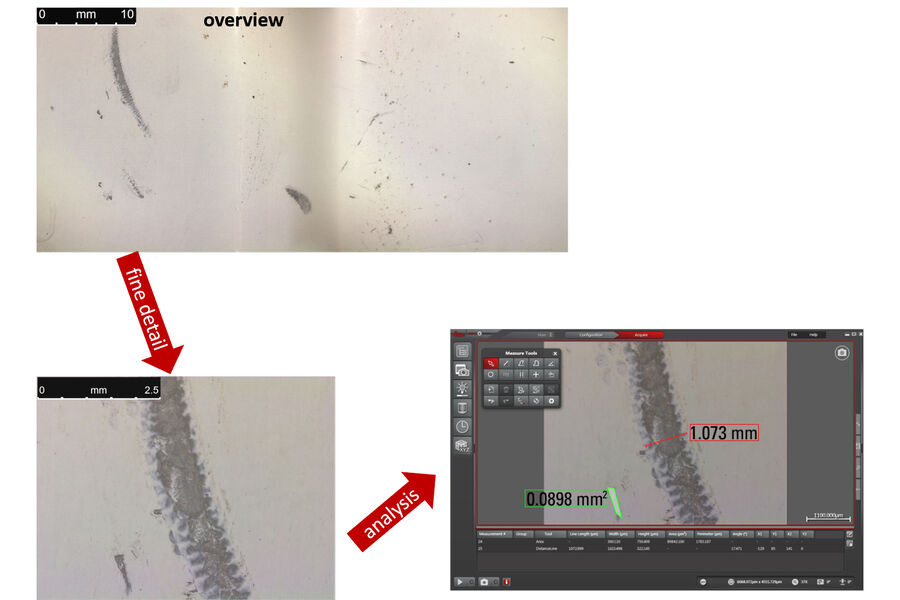
Finally, a metal plate from an automobile body covered with white paint was investigated. The images below (from overview to fine detail and analysis) are of the plate’s painted surface showing scratches.
Summary
The table 1 below shows the advantages when doing auto parts investigation and documentation with the DVM6 digital microscope.
Advantage | DVM6 Feature | |
| Fast Large Overview | 2D Imaging (large to small field of view) | X-Y Stitching |
| Quick & Easy Magnification Change | 16:1 Zoom Optics | Low, Mid, High Mag Objectives 12x to 2,350x |
| Change Viewing Perspective Rapidly | Eucentric Tilting, ±60° | Sample Rotation, ±180° |
| Fast 3D Models | 3D Imaging | Extended Depth of Field |
| Versatile Contrast Methods | Integrated Ring & Coaxial Light Illumination | |
| Easy Operation by Multiple Users | Intuitive LAS X Software | |
Table 1: Users can efficiently investigate and document auto parts with the DVM6 digital microscope thanks to a convenient way to: 1) change magnification rapidly over the full range, 2) tilt and rotate, 3) use the versatile, integrated illumination, 4) obtain reliable results, and 5) operate the microscope with little training.
Conclusions
The results reported here for automotive part verification demonstrate that an efficient workflow can be achieved when confirming specifications for R&D and production with a digital microscope. Automotive suppliers and manufacturers can easily check that the auto parts and components meet specifications. To maintain the performance and safety standards of automobiles and vehicles, strict specifications are critical.
