
Background
Mammalian cell cultures are essential for clinical and pharmaceutical research and applications. They allow flexibility in model systems used for health and disease, e.g., functional studies, help support in-silico analysis, and can be an alternative to animal models.
Cell proliferation is dependent on the cell type, whether they are primary cells (isolated from animal tissues), embryonic stem cells, self-renewing cells, immortalized stable cell lines, or transformed cells, and on the culture conditions (media, 2D/3D extracellular matrix, temperature, PH, CO2/O2 levels). Once in optimal culture conditions, cells can be grown for different experimental analysis. With advancements in animal-cell-culture technology, cell lines have evolved and are also used for vaccine production, therapeutic proteins, pharmaceutical agents, and anti-cancerous agents.
For a successful maintenance of mammalian cell lines, cells must be grown under controlled conditions and require their own specific growth medium. In addition, to guarantee physiological and phenotypical stability, their growth must be monitored at regular intervals. In general, when a cell line reaches about 80% confluency, the cells must be subcultured to ensure proper growth and health. A confluency of 80% means that 80% of the culture vessel surface is covered with cells. Note that the ideal confluency for subculturing cells depends on the cell type and might have to be optimized.
This article describes a typical workflow for subculturing an adherent cell line with a step-by-step description and detailed illustrations (Figure 2).
Why do I need to split my cells?
Once a cell culture is initiated, it cannot be grown indefinitely, due to the ever-increasing number of cells in a confined area, consumption of nutrients, and increase in toxic metabolites which eventually results in cell death. Moreover, researchers usually need to replicate experiments and, therefore, rationalize or expand the cells in culture. Subculturing or splitting the cells produces new cultures with lower cell density than the original culture. By removing the medium and transferring the cells into fresh growth medium and matrix, the cells are given fresh nutrients and toxic metabolites are removed, allowing long-term maintenance of the culture. After initially seeding the cells, growth starts with lag phase and proceeds to a log phase, where the cells proliferate exponentially followed by a stationary phase where growth rate and death rate are equal. (Fig. 1). In the death phase, cells die due to lack of nutrients or inadequate culture conditions, such as when cells start competing for space due to high or overconfluency.

To keep cells in optimal culture conditions and actively growing, it is necessary to renew the growth medium and to subculture them at regular intervals. Change of culture medium can take place several times in the log phase dependent on the cell type. The best time to subculture cells is between the log phase and the stationary phase, before the cells reach confluence.
Why do I need to examine my cells?
It is important to examine the cell culture every day, and immediately prior to subculturing, as a means to monitor cell health, check for contamination, and determine when to split the cells. A first examination of the culture for fungal contamination, turbidity, and particles in the medium as well as unexpected pH shifts, indicated by color change of the medium, can be done at the macroscopic level by eye. However, the absence of bacterial contamination should be confirmed at high magnifications. After this, a closer check of the general cellular morphology and growth patterns should be examined using an inverted microscope. The optics of an inverted microscope are located below the specimen. Because the cells are attached to the bottom of the dish, they can be viewed easily from this perspective. Observation should take place with a total magnification of 100 – 200x and phase contrast [1], because most cells are difficult to observe in normal brightfield illumination.
There are many types of mammalian cell morphology, but most mammalian cells in culture can be divided into 3 categories: fibroblast cells (Chinese hamster ovary (CHO) cells), epithelial-like cells (human cervix (HeLa) cells), and lymphoblast-like cells (human leukemia (HL60) cells). In addition, certain cell lines can have specific morphological characteristics, e.g., neurons (SH-SY5Y) which have long dendritic elongations. Cell morphology is also affected by events in the cell lifecycle. During mitosis many cells become more round, forming very refractile bright spheres that may float around in the medium. Dead cells show changes in their membrane integrity, become more round, and, in the case of adherent cells, detach from the growth surface. Under a microscope, dead cells are usually not bright and refractile and may show changes in their typical membrane morphology.
Various cell lines not only differ in size and shape, but also in their growth behavior. They either grow as adherent cells (fibroblastic and epithelial cells) or in suspension (lymphoblast-like cells). Most adherent cell lines grow as a single cell layer (monolayer) attached to glass or treated plastic substrates (e.g., coated with poly-lysine, fibronectin, collagen, or gelatin).
How can I subculture my cells?
The most common method to prepare cells for subculture is by breaking the intercellular and cell-to-substrate bonds with proteolytic enzymes like trypsin. Trypsin in combination with Ethylenediaminetetraacetic acid (EDTA) causes cells to detach from the growth surface. Trypsin cuts away the focal adhesions that anchor the cell to the culture dish and EDTA acts as a calcium chelator.
Depending on the cell type or downstream experiments, other proteases may be used as an alternative to trypsin, such as natural collagenases or synthetic dissociation cocktail solutions.
By removing calcium, cadherins which are involved in cell-cell interactions are broken and the cells separate from one another. Once no longer bond to the growth surface and surrounding cells, they can be easily separated and grown in new cell culture dishes. Cell culture conditions and subculture methods vary for each cell type. Figure 2 describes the basic steps in the subculture workflow. During the whole subculture process, it is important to work in a contamination-free environment. Examination of the cells at the beginning, during trypsinization, cell counting, and after splitting is essential. For consistent results and tracking of experiments, maintaining good records and documentation is also important.

The following protocol describes the basic principles of the subculture routine for Madin-Darby canine kidney (MDCK) cells grown in a 90 mm petri dish. These are epithelial cells isolated from the distal tubules of a dog. In culture, they grow adherently and form a monolayer of polygonal cells after they have reached confluence.
The following material and equipment are needed for subculture:
Materials:
- Medium pre-warmed to 37° C (for MDCK cells: MEM with 5% FCS , 2 mM glutamine, 100 U/mL penicillin, 100 mg/mL streptomycin);
- Pre-warmed PBS without calcium (Ca) nor magnesium (Mg);
- Pre-warmed 0.05% trypsin, 0.02% EDTA in D-PBS;
- Trypan blue (vital stain); and
- 70% ethanol or isopropanol for disinfection.
When working with animal-free or chemically defined cultures, use serum-free culture media, synthetic FBS/ FCS substitute, and non-animal derived dissociation agents.
Equipment:
- Cell counting chamber pipette or micropipette with disposable tips;
- Phase-contrast capable inverted microscope (DMi1, Mateo TL);
- Protective clothing and materials;
- Water bath set to appropriate temperature;
- Incubator at 37°C with 5% CO2 and high humidity;
- Centrifuge;
- Centrifuge tubes;
- Pre-labelled dishes.
For MDCK cells, the splitting ratio should be 1:10. Adjust the splitting ratio for the cell type. For instance, primary cultures, immortalized cell lines, or embryonic stem cells might have different optimal splitting ratios.
4-steps-workflow for subculture of adherent cells as conducted with the Leica DMi1
Step 1: Cell examination
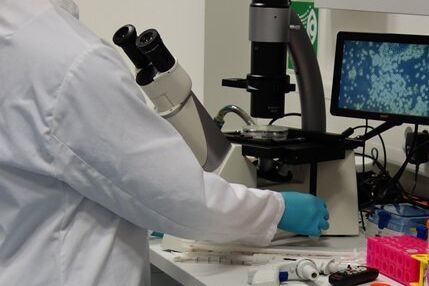
Take cells out of the incubator and put them under the microscope for a quick cell check. Cells should be checked microscopically every day to ensure they are healthy (no contamination, few dead cells) and growing as expected.

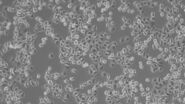
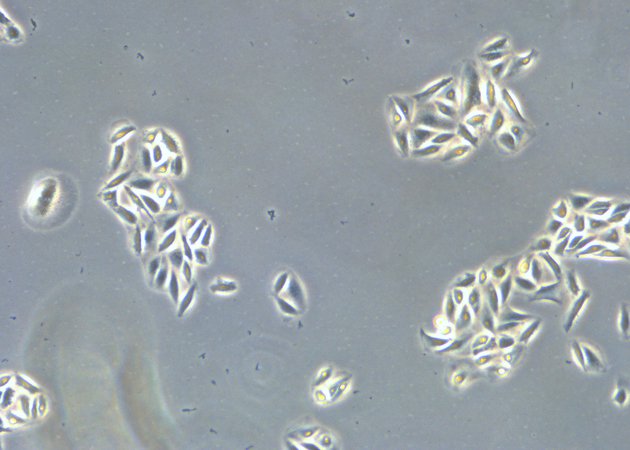
When culturing adherent cells, they should be mainly attached to the bottom of the dish or flask and the media should be pink-orange in color. The pH indicator phenol red turns yellow upon acidification as a result of metabolism products from the cells (or contamination) in the media. MDCK cells are polygonal in shape when in the log phase and grow as a monolayer. They are difficult to see with normal brightfield illumination. By switching to phase contrast, the cells can be identified more easily. With the DMi1, phase contrast can be selected by simply moving the slider housing of the condenser annulus as shown.
Documentation of the cell status is very important to ensure uniform results across experiments. The DMi1 can be equipped with a camera and screen which allows easy imaging and saving via remote control . With the integrated camera of the Mateo TL, researchers can take images of their cells to keep track of the culture status and transfer the images to a smart device or USB stick.

Comparison of brightfield and phase-contrast images of MDCK cells: the phase-contrast image gives a better overview and makes inspection of the cell morphology and cell counting easier.

Step 2: Cell harvesting
Pipette the medium away from the cells into a waste container. A pipette connected to a vacuum aspirator can also be used.

Carefully wash cells up to 3 times with 5 ml pre-warmed PBS without Ca and Mg to get rid of the fetal bovine serum (FBS) in residual culture media. FBS or FBS substitutes will inhibit the trypsin. Add 3 ml pre-warmed Trypsin/EDTA and swirl gently to cover all cells at the bottom of the dish. Incubate cells for a few minutes at 37°C to detach them.
 in residual culture media.")
Different cell lines require different trypsin incubation times. To avoid over-trypsinization which can damage the cells, check them every few minutes under the microscope.
Gently rinse plate and transfer cell suspension into a 50 ml tube and spin them down for 5 min at 800 rpm. Aspirate the supernatant and resuspend the cells in 10 ml fresh medium to fully remove the trypsin.

Detached cells should be round shaped and free floating in the trypsin solution. As soon as cells have detached, add 5 ml culture medium to the dish to inactivate the trypsin.

Step 3: Cell counting
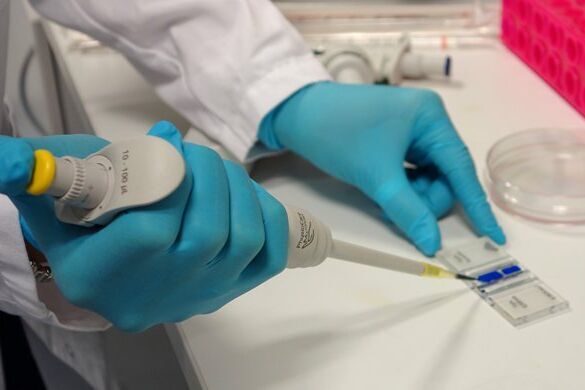
Mix a 100 µL cell suspension with an equal amount of 0.4% trypan blue solution. Trypan blue selectively penetrates cell membranes of dead cells and stains them blue but is not absorbed by living cells. Prepare the hemocytometer by placing the coverslip over the counting surface.

Load the counting chamber with the cell suspension (~ 4 µl per counting area) by placing the pipette tip at the edge of the cover slip and gently expelling the cell suspension. The area under the cover slip is filled by capillary action. In most cases, the chamber has two counting areas that can be loaded independently.
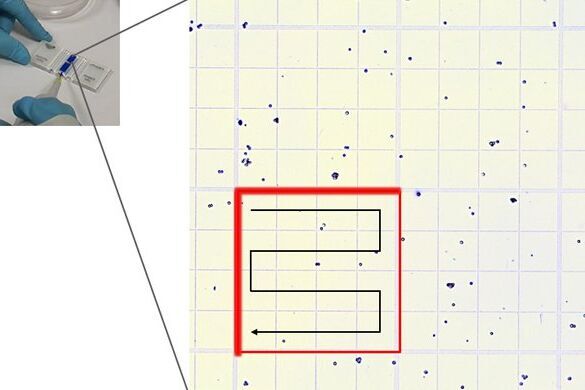
Place the chamber on the microscope stage and focus on the cells. The square pattern of the counting grid depends on the chamber type. The Fuchs-Rosenthal counting chamber seen here has a pattern of 16 areas, 1 square millimeter each, bordered by triple lines. Each square is subdivided into 16 smaller squares. Count all the cells in an area of 16 squares, as shown in the figure. To avoid counting cells twice at the edges of the greater square area, count only those cells on the lines of two sides of a square. In this example, the cells touching the upper and left red-marked borders of the square should be counted (thicker red lines). Cells touching the lower and right red borders should not be counted. Count the live and dead cells in 5 of the 1 square millimeter areas of the counting chamber. For calculating the final result, you will need to combine the counting results from all 5 squares. For greater measurement accuracy, cell counting in additional squares of the chamber (more than 5) can also be done.
The cell concentration can be calculated with the following formula:

As an alternative method, an automatic cell counter can be used.
Step 4: Plating
Pipette the required volume of cells (appropriate number of cells) into new dishes at the required split ratio (here 1:10) and top it off with culture medium to the required final volume in each dish (10 ml). Note the cell type, day of cell splitting, and passage number on the lid of the dish. Place cells back in the incubator at 37°C.
 into new dishes at the required split ratio (here 1:10) and top it off with culture medium to the required final volume in each dish (10 ml).")
Leave cells overnight to recover and settle. After 24 hours, check the cells for shape, adhesion, and presence of contamination with the microscope.

Cells should be attached to the bottom of the dish and already have started to grow and divide. Change the media to get rid of any residual dissociation agent or cell debris. Grow cells until they are confluent and ready for an experiment or the next subculture.
 W. Ockenga, Phase Contrast: Making Unstained Phase Objects Visible, Science Lab (2011) Leica Microsystems. https://www.leica-microsystems.com/science-lab/phase-contrast")
 applied. Image courtesy of Samuel East, Uncommon Bio.")