Immersion liquids
One of the main problems in light microscopy is to overcome some of the limits of optical resolution and to increase the numerical aperture (NA) of the system. In brief, the NA of an objective is the ability to gather light from a specimen whereas resolution is the ability of an objective to distinguish details in the specimen [1].
Resolution and NA will be covered in other articles [2], but we will now examine immersion techniques available to microscopists which allow the imaging of specimens at high magnification while overcoming some of the limits of resolution.
Having an immersion liquid in place of the air gap between the front lens of an objective and the cover glass or glass coverslip of a specimen increases the resolution of an objective [3]. When light passes from one medium to another (for example, through glass to air) it refracts - in other words, it bends and scatters. Any light rays which are refracted into the air, reflected by the glass coverslip, or actually blocked by the metal housing of the objective front lens do not contribute to the image formation. The purpose of the immersion liquid is to decrease the amount of refraction and reflection of light from the specimen and increase the ability of the objective to capture this otherwise deviated light (refer to Figure 1).

Refractive index
The physical properties of the medium, through which light rays travel, determines the degree to which the light will be refracted. The ”refractive index” (n) is a numerical value (without units) which determines the extent to which light will refract when passing through a material. Air has a refractive index of 1.0, whereas microscope slides and glass coverslips typically have refractive indices of 1.5. Taking this difference into account, the purpose of the immersion liquid is to match (as closely as possible) the refractive index of the glass between which the specimen is mounted, therefore, increasing the amount of light rays which will form the final image. Subsequently, most immersion oils have a refractive index of 1.51. For common refractive indices, see Table 1.
| Immersion Medium | RI (n) |
| Air | 1.00 |
| Water | 1.33 |
| Glycerol (100%) | 1.47 |
| 80% glycerol / 20% water mixture | 1.45 |
| Cedar Oil | 1.51 |
| Leica Immersion Oil (type N and F) | 1.52 |
| Glass | RI (n) |
| Borosilicate or “Pyrex” | 1.47 |
| Crown or soda-lime | 1.52 |
| Mounting Medium | RI (n) |
| Cell Culture Medium (PBS) | 1.31 to 1.34 |
| Fluormount-GTM | 1.4 |
| ProLong* Diamond / ProLong* Gold | 1.47 |
| VECTASHIELD® | 1.45 |
| VECTASHIELD® HardSetTM | 1.46 |
| Mowiol* | 1.46 |
Table 1: Refractive indices (RIs) of various objective-immersion media, glass types used for slides, coverslips, or substrates, and specimen-mounting media.
A homogenous immersion system
The ideal scenario is to create what is known as a ”Homogenous Immersion System”. Using this system, it is possible to achieve the maximum resolution and NA. The purpose of the homogenous immersion system is to match (as closely as possible) the refractive index and NA of the front lens of the objective, the immersion medium, glass coverslip/slide, the mounting medium, and (in principle) the lens of the condenser (refer to Figure 2 and Table 1).
Placing immersion liquid on the lens of the condenser is usually not necessary. If the microscope is correctly set up and aligned to achieve optimal contrast and illumination across the specimen [4], then the position and settings of the condenser will be optimized, so as to contribute to the overall NA of the microscope system.

Working distance
One other factor which needs to be considered with microscope objectives is the ‘Working Distance’. This is simply the actual distance between the objective front lens and the surface of the cover glass when the specimen is in sharp focus (refer to Figure 3). When the objective is moved to be closer to the slide, the focal plane moves further into the specimen. However, this is physically limited by the fact that the objective can only be moved until it is in contact with the coverslip. There is an inverse relationship between working distances and the magnification of each objective. For example, a 10x objective may have a working distance of 4 mm, whereas the working distance of a 100x oil objective will typically be in the region of 0.13 mm. In comparison, some water immersion/water dipping objectives offer working distances of around 3 mm. The working distance is another piece of information which is usually engraved on the barrel of the objective and abbreviated as ”WD”.

Immersion oil and objectives
A crucial factor to remember when using oil objectives is to use the correctly matched immersion oil. Only use oil which is recommended by the objective manufacturer. For many years, cedar wood oil was routinely used for immersion (and is still commercially available). Although this oil has a refractive index of 1.516, it has a tendency to harden and can cause lens damage if not removed after use. In addition, this oil will absorb blue wavelength and ultraviolet light and can also yellow with age.

Most modern oils are synthetically manufactured and standardized to ensure that they do not damage lenses or change color with age. One point to bear in mind is that immersion oil has an optimal working temperature. Most commercially available synthetic oils are designed to work at 23° C and a change of only 1° C will result in a change in the refractive index of 0.0004. Other oils are available to optimally work at different temperatures, but for most purposes, a microscope facility should be kept stable at 23° C (this is also important for housing instruments like confocal microscopes).
When using oil-immersion objectives (refer to Figure 4) for fluorescence microscopy, it is recommended to use special low autofluorescence oil. Many general oils will fluoresce under certain conditions. Most of the oils for fluorescence microscopy are identified by having the letter ‘F’ before or after the oil name/code.
Using an oil-immersion objective
- Start by viewing your sample with a low-magnification objective to find the area of interest on your slide.
- Work up to the 40x objective and set up the microscope for Koehler illumination.
- Swing the nosepiece (the turret which houses the objectives) around between the 40x and 100x objective, but do not fully engage the high-power objective.
- Whilst looking from the side of the microscope, carefully place one drop of immersion oil directly onto the glass coverslip. Swing the high-power objective into place and (continuing to look at the stage from the side), use the coarse and then the fine focus to bring the objective front lens into contact with the oil. Some oil objectives have a concave front lens which means you should also add a drop of oil to the objective to prevent air bubbles becoming trapped in the concave lens.
- You can then look down the eyepieces again. Use only the fine focus to adjust the field of view. Although high-power objectives have a spring-loaded nose, coarse focusing at this stage can easily result in cracking the cover glass or slide and can also damage the objective front lens.
- Even if you plan to examine other slides, you should remove the oil from the objective at this stage to prevent possible contamination of other parts of the microscope. Immersion oil can (and will) penetrate and damage microscope components and objectives not suited for immersion. Remove excess oil using a lens cleaning tissue with a single sweep across the lens. Keep wiping the objective front lens with a clean piece of tissue for each wipe until no trace of oil remains. Commercial oil removal solutions are available or a small amount of xylene can be used to finally clean the lens. Again, it is important to check the recommendations from the objective manufacturer before applying any solutions to the lens [5].
Water immersion objectives
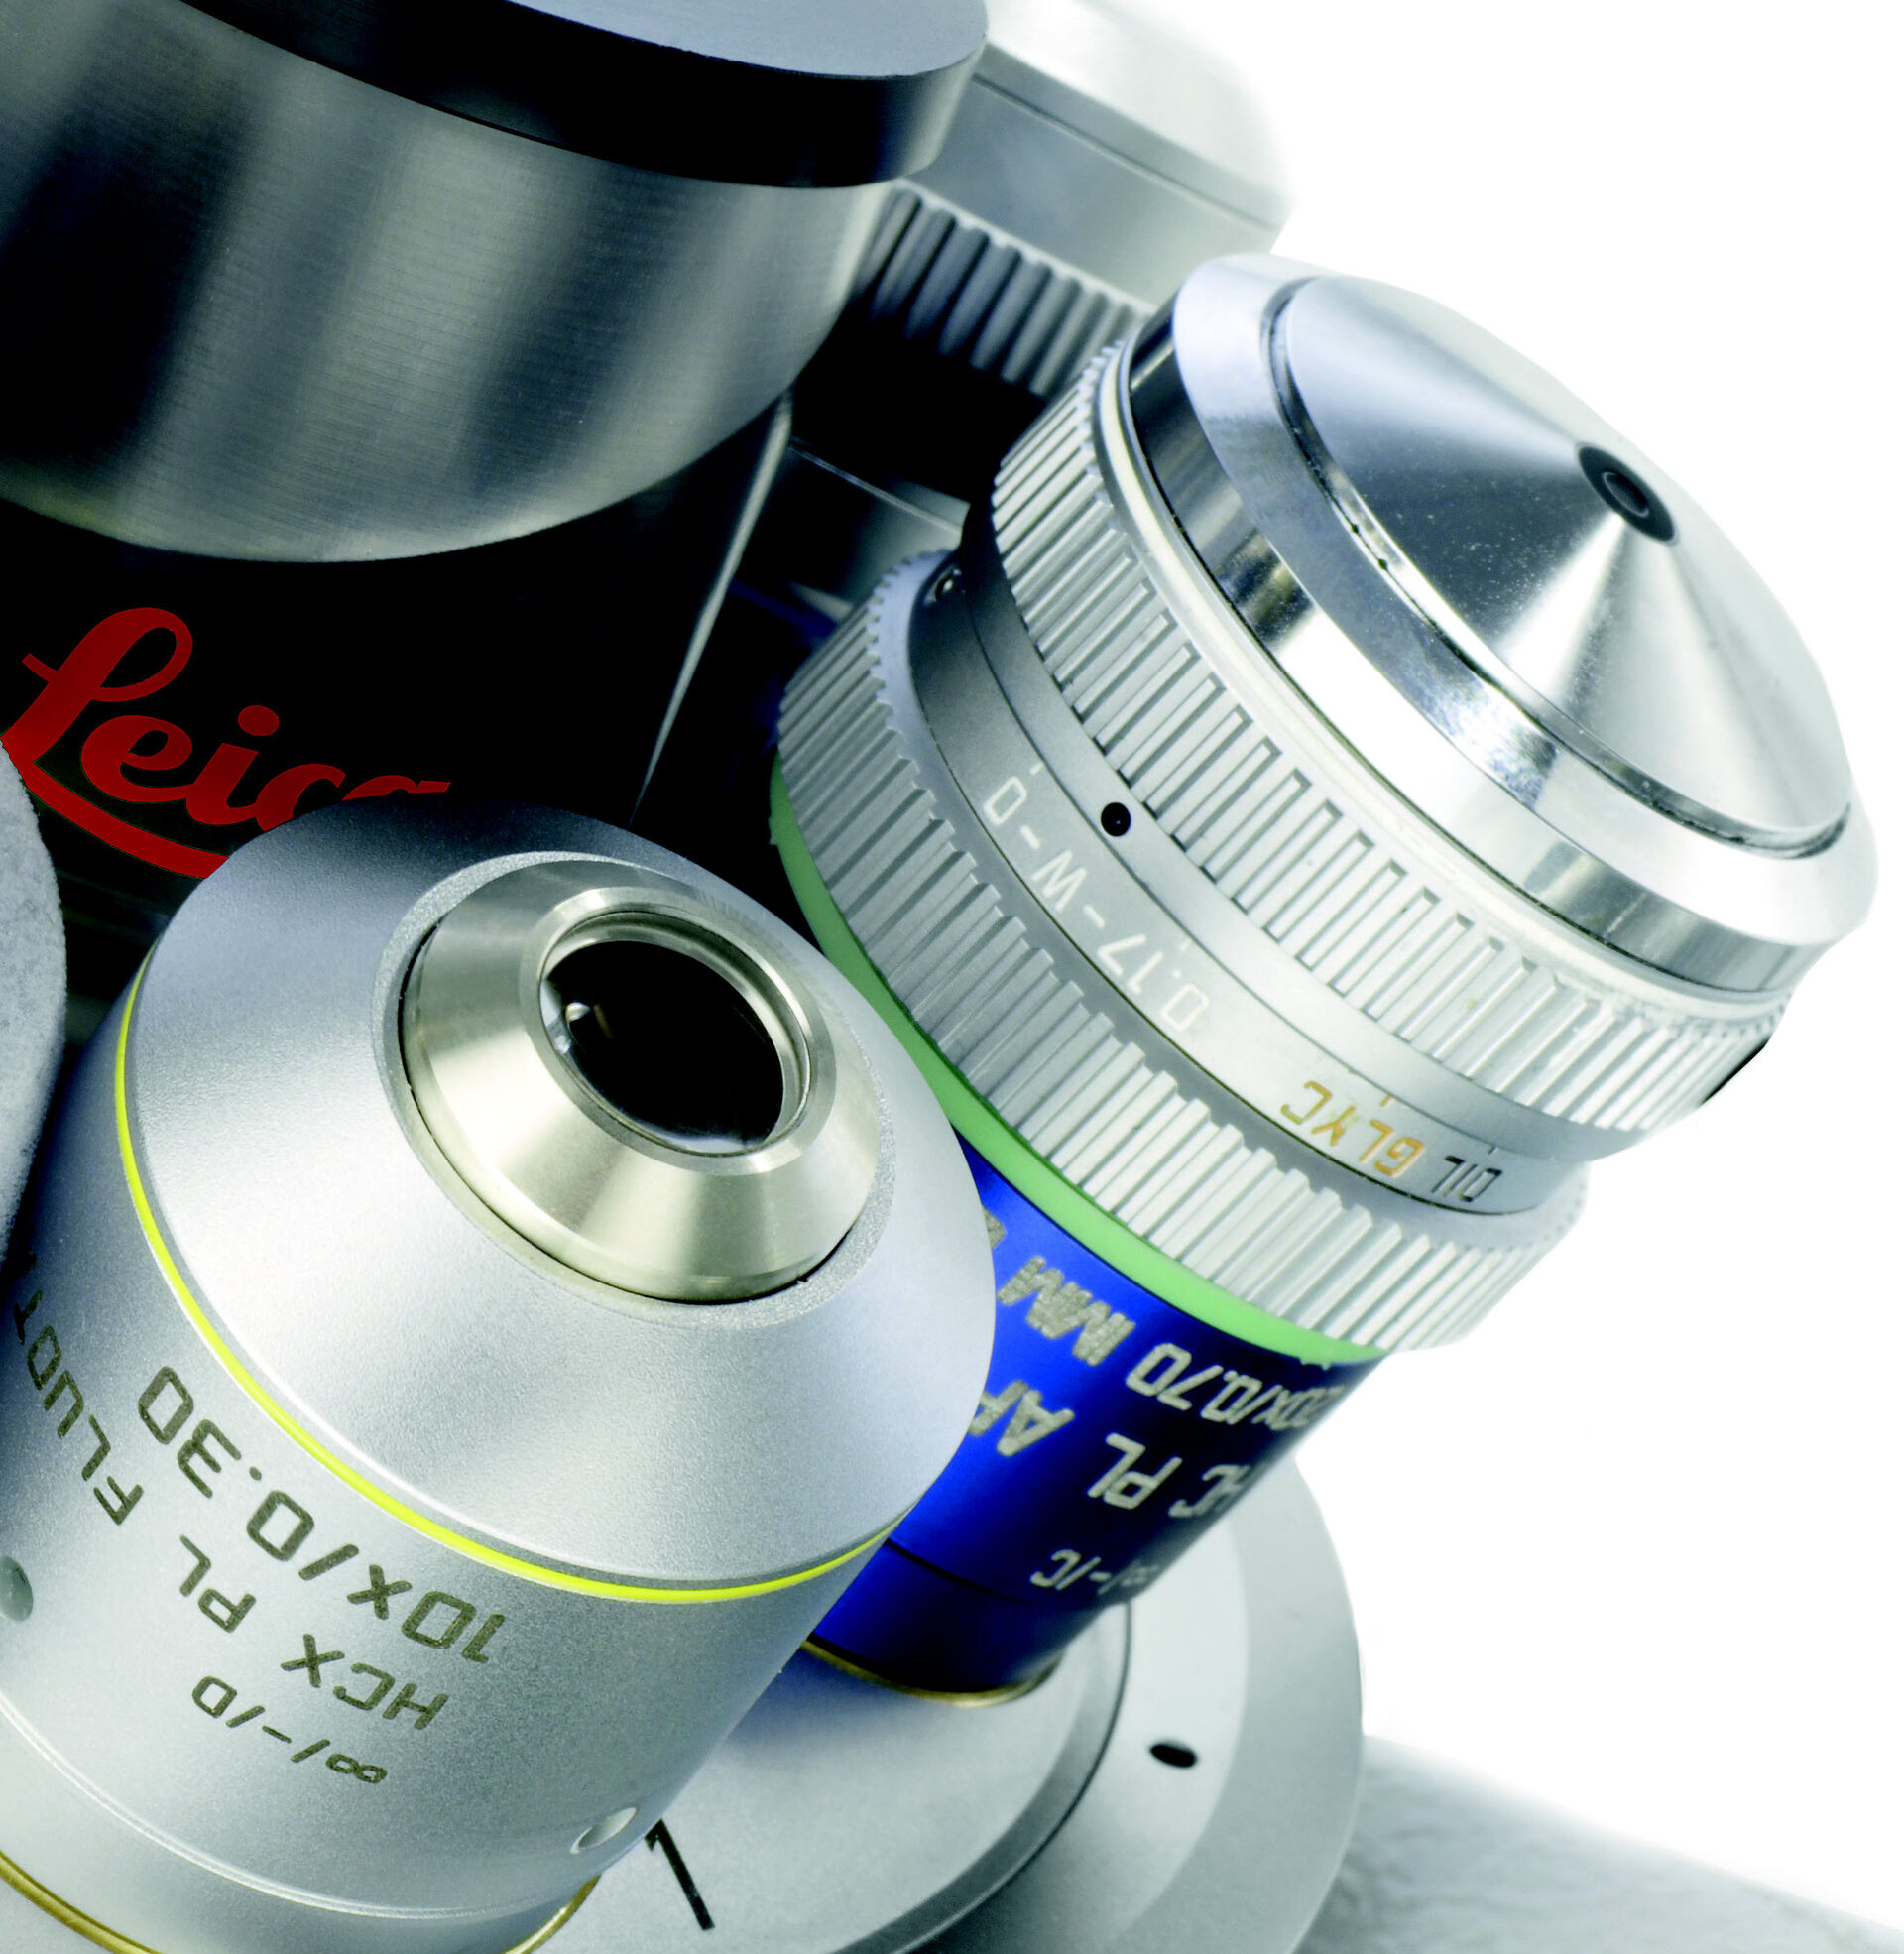
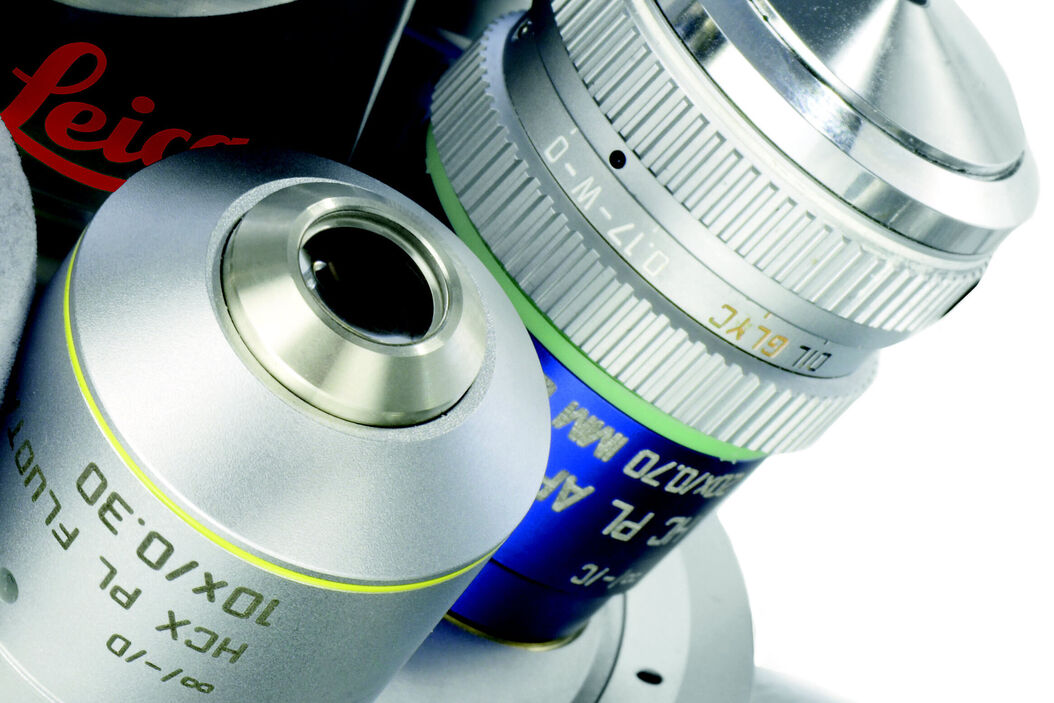
A less common immersion objective found on research-grade microscopes (and usually confocal microscopes) is the ‘water-immersion’ objective, usually abbreviated as ‘WI’ or ‘W’ on the barrel of the objective. The water immersion objective is highly recommended when imaging live cells which are in cell medium. There are two types of water immersions objectives (s. Figure 5) - ‘water immersion’ and ‘water dipping’ (usually abbreviated as ‘WD’ on the barrel of the objective and not to be confused with ‘Working Distance’).

The water dipping objectives are commonly used with an upright microscope configuration and are used to dip directly into water or water-based medium/buffer. The dipping objectives are manufactured to provide a very long working distance. They are also manufactured with steeply angled nose-pieces which are constructed from inert material such as ceramic. Water immersion objectives are used in a manner similar to oil immersion objectives, but with water in place of the drop of oil.
One of the advantages of using a water immersion objective is simply that water is used as the immersion medium. This is obviously easy to apply and clean off. Additionally, you do not need to use specific immersion oil depending on the imaging you are carrying out, nor do you need to use an immersion medium as specified by the manufacturer of the microscope and objective. There are, however, some disadvantages when using a water immersion objective. A higher resolution is achievable with oil immersion objectives compared to the aqueous objectives. In addition, due to the viscosity of water (compared to oil), the use of water immersion objectives can be susceptible to vibrations and small air movements. Such artefacts can be overcome by ensuring the microscope is placed on an anti-vibration table. Alternatively, a more simple solution is to place a special ring which sits over the slide to create a small pool of water. The final disadvantage of water immersion objectives is their cost. Some water immersion objectives can cost as much as a complete research grade microscope.
Leica offers a Water Immersion Micro Dispenser which overcomes the potential problem of water evaporation during long-term live-cell imaging or screening experiments (s. Figure 6).

Overall, the main advantage of water-immersion objectives is for the imaging of live cells and tissue. It is mainly due to the fact that oil-immersion objectives are not intended for imaging through cell or tissue chambers used for live-cell microscopy.
Live cell imaging
Living cells are usually contained within a chamber, as well as being covered with a cell medium (or buffer), to help ensure that the cells or tissue are maintained within a stable environment during imaging [6-10]. As a consequence, the optimum focal distance will be at a relatively large distance from the cover of the chamber. This fact makes the short working distance of oil-immersion objectives impractical for imaging cells or tissue through a glass coverslip/chamber and medium/buffer.
Furthermore, using an oil-immersion objective to view cells within an aqueous medium would add additional refraction problems, as oil and water have different refractive indices.
When viewing living cells within a chamber, the light path will encounter different refractive indices. The material of the chamber/coverslip and aqueous medium covering the cells or tissue will each have a different refractive index. The light which forms the specimen image will be refracted at each stage which can lead to spherical aberrations.
Correction collars
Despite the refraction which can occur at water, glass, or plastic interfaces, water-immersion objectives are usually corrected for it. In addition, some water-immersion objectives have correction collars. These rings around the objective barrel can be adjusted to suit the different thickness of glass coverslips.
There are also motorized correction collar objectives which allow for precise and remote adjustment of objectives which ensure that the optimal resolution is restored with the minimum of disruption to the samples and imaging setup (refer to Figure 7).
A correction collar enables the objective to be adjusted for different thicknesses of coverslips. A motorized correction collar allows the objective to maintain optimal settings with a minimum of disruption.

Water immersion and confocal
Finally, one of the most suitable applications for water-immersion objectives is the confocal imaging of live cells [11,12] and, for this reason, they are usually one of the standard features of many confocal systems. Due to the low viscosity of water versus oil, the use of these objectives results in less surface tension across the cover slip which means there is less chance of displacement of the specimen especially during the acquisition of Z-stacks.
Glycerol immersion objectives
Glycerol is an additional immersion medium. A lot of fixed samples are mounted in Mowiol, Vectashield or similar mixtures based on glycerol (s. Table 1). These media have refractive indexes close to that of a 80/20 glycerol/water mixture (RI=1.45). Glycerol objectives (s. Figure 8) are the best choice for samples mounted in such media.
.")
Glycerol is an additional immersion medium. A lot of fixed samples are mounted in Mowiol, VECTASHIELD, or similar mixtures based on glycerol (refer to Table 1). These media have refractive indices close to that of an 80%/20% glycerol/water mixture. Glycerol-immersion objectives (refer to Figure 8) are the best choice for samples mounted in such media.