High-Pressure Freezing for Organoids: Cryo CLEM & FIB Lift Out
From vitrified organoids to tomograms: fluorescence guided targeting and efficient lift out for confident Cryo ET
 labeled with membrane-permeable calcein, high-pressure frozen in salt water using EM ICE.")
Master cryo EM workflow steps for challenging 3D samples: when to choose HPF vs. plunge freezing, reproducible blotting/ice control, contamination aware transfers, Cryo CLEM 3D targeting in organoids, serial lift out, and lamella polishing (~200 nm) for tomography—plus practical notes for low contrast and charging in HPF tissues.
Key learnings
- HPF vs plunge—for 3D tissues/organoids: Why HPF (EM ICE) is preferred for larger/thicker specimens—including organoids and tissue slices—and how it preserves native structure for downstream cryo‑ET/FIB workflows.
- 3D targeting inside organoids with Cryo‑CLEM: Use cryo confocal overview imaging to locate ROIs in planchets and carry coordinates into FIB‑SEM for trench placement and lift‑out.
- Contamination/devitrification control during transfers: Cover box (dry N₂), GN₂ “curtain” at the cryogen area, and vacuum transfer help minimize exposure and maintain cryo integrity across instruments.
- Low contrast & charging in HPF samples: What to expect in cryo‑volume EM of organoids (lower contrast, charging) and how lifetime tools/optimized excitation can reduce background and laser power during cryo fluorescence.
- Lift‑out & lamella quality: Step‑by‑step guidance on serial lift‑out, copper redeposition “welding,” receiving‑grid orientation (front face towards FIB), and shallow‑angle polishing to ~200 nm.
Vitrification choices: High‑pressure freezing vs plunge freezing
Selecting the vitrification method depends on sample size, nature, and downstream workflow. Plunge freezing with the EM GP2 is appropriate for thin suspensions, single particles, and small cells. EM ICE high‑pressure freezing (HPF) is used for larger or thicker specimens—including tissues, monolayers on sapphire, and the waffle method—to maintain native structure for cryo‑ET, cryo‑FIB and related routes. Decision points focus on practical limits (thickness, complexity) and alignment with subsequent steps such as lamella preparation and correlative imaging.
Blotting & ice control with EM GP2
For reproducible ice thickness, the webinar covers single‑side blotting with optional grid rotation, sensor‑blotting (stops upon liquid contact with configurable extra move), and configurable pre/post‑blot delays—plus chamber humidity/temperature readouts and a GN₂ “curtain” to shield the cryogen area during transfers.
Contamination‑aware transfer and coating
Clean handling from preparation to imaging is supported by a coordinated chain: the cover box (dry nitrogen atmosphere, pre‑cooling for tools) for grid loading into the transfer shuttle; EM VCT/VCM vacuum transfer for holders (grids, planchets, pins); and docking to EM ACE600 for cryo coating, then onward to cryo‑SEM. This integrated path aims to limit exposure, reduce handling steps, and maintain cryo conditions during movement between instruments.
3D targeting and coordinate carry‑over with STELLARIS Cryo
Target identification and correlation are supported by STELLARIS Cryo. Overview imaging (widefield/confocal) locates samples on grids or planchets; TauSense/FALCON lifetime tools help separate signal from background (e.g., carbon film). The Navigator stores lamella positions (XY/Z) and metadata that can be used in FIB‑SEM to refine milling locations, with compatibility noted for downstream software options. This enables consistent 3D ROI targeting and coordinated hand‑off to milling.
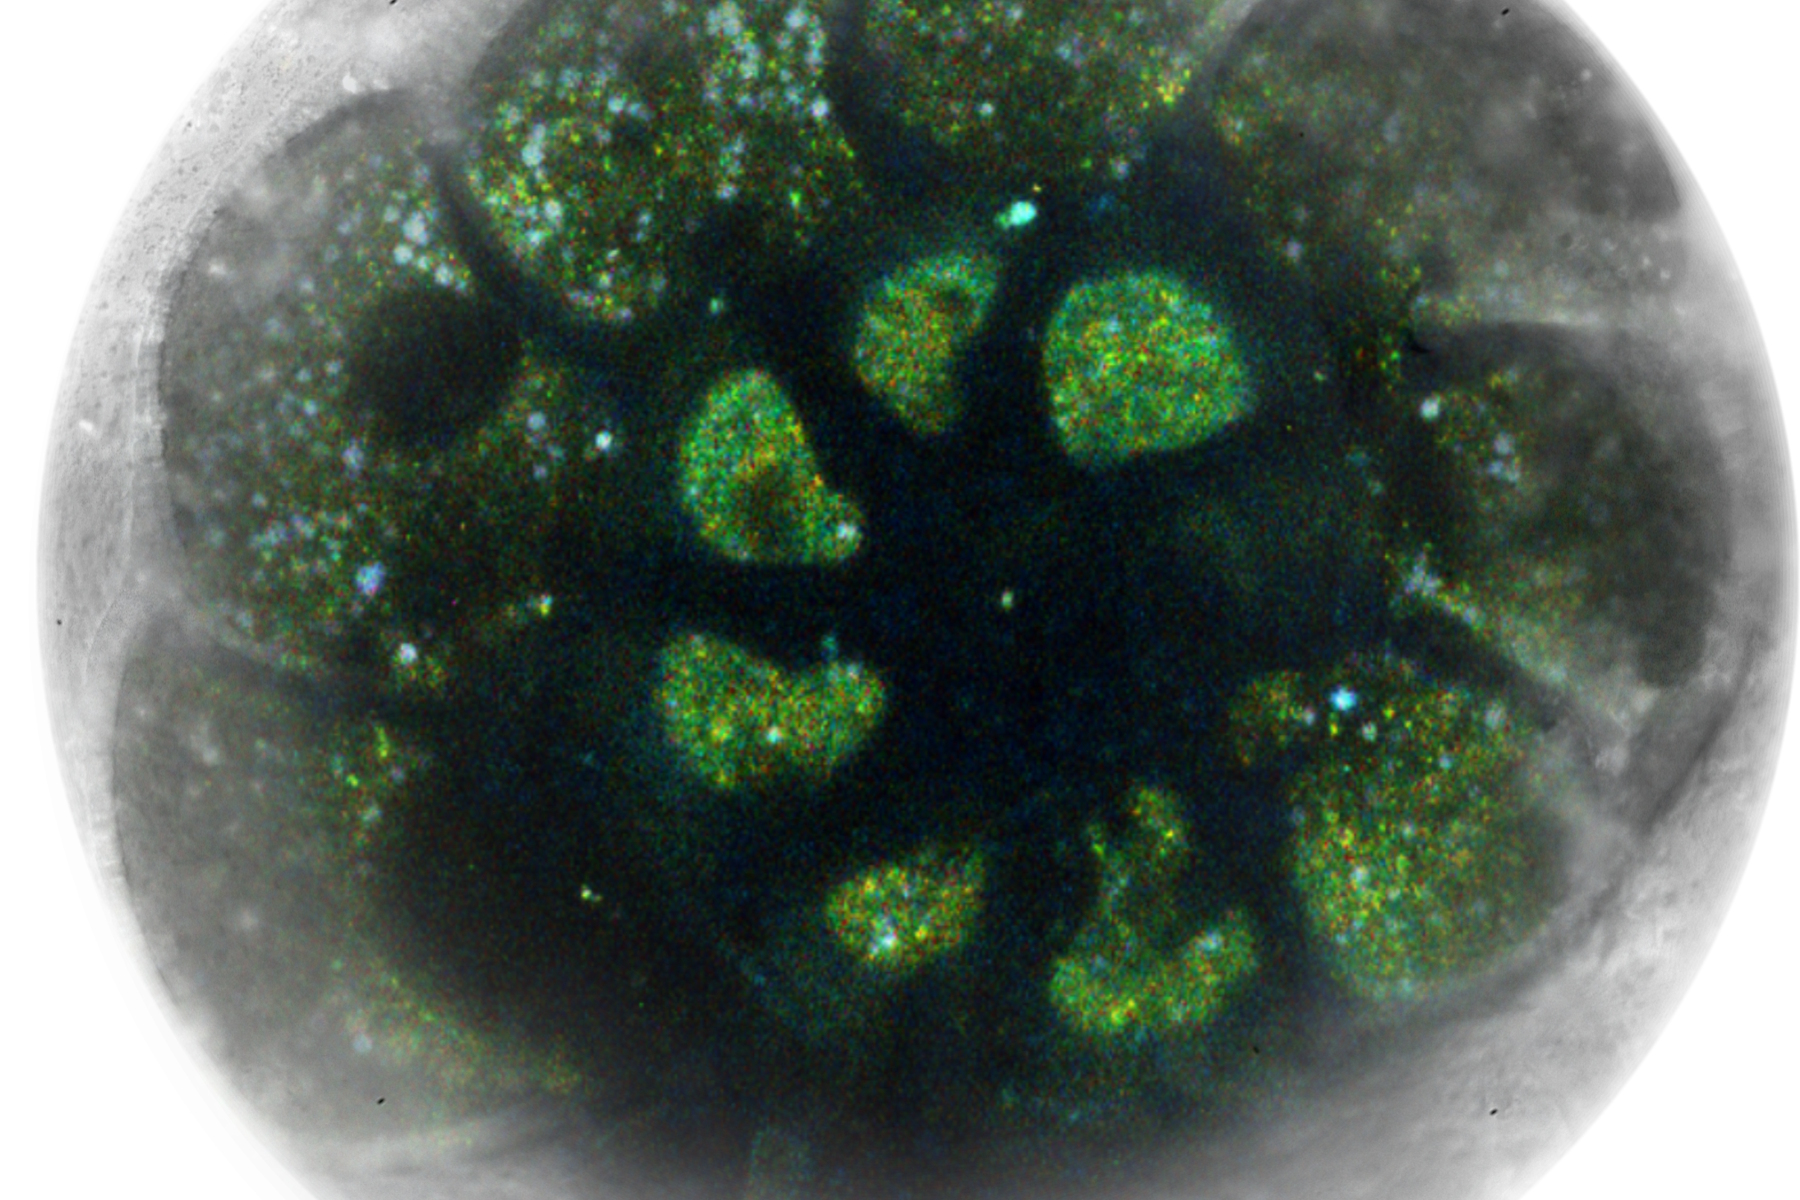
 labeled with membrane-permeable calcein, high-pressure frozen in salt water using EM ICE.")
Fig.1: Foraminifera (Ammonia confertitesta) labeled with membrane-permeable calcein, high-pressure frozen in salt water using EM ICE. The sample was cryo-planed and targeted with the M205 on the Cryo-Fluo Enuity, then transferred under cryo conditions to the Cryo-Stellaris for widefield and confocal imaging, revealing details of the staining pattern. Image courtesy: David Evans, University of Southampton.
FIB‑SEM serial lift‑out and lamella preparation to around 200 nm
Lamella preparation steps include designing trench geometry, performing undercuts with appropriate stage tilts, attaching ice blocks via copper redeposition (“welding”) to the micromanipulator and to the receiving grid, and orienting slices so the lamella face the ion beam. Shallow‑angle polishing with step‑down currents is then applied to reach around 200 nm thickness. These procedures support preparation of HPF tissues and organoids for cryo‑ET, with attention to geometry, orientation, and controlled thinning.
Practical notes for low‑contrast, charge‑prone imaging in HPF organoids
Cryo‑volume EM datasets in organoids exhibit lower contrast and significant charging; nonetheless, contextual structures (nuclei, lipid droplets, mitochondria, microvilli) remain discernible for better targeting. Combining cryo light data with EM helps place milling patterns and assess devitrification before final acquisition.
Looking ahead (as discussed by speakers)
Future work includes improved vitrification for high‑water‑content organoids (e.g., grown in Matrigel) and further automation of milling and data processing, including machine‑learning‑based, on‑the‑fly segmentation and correlation within the workflow.
Related Articles
-
 using the Leica EM VCT500 transfer system.")
Ultramicrotome UC Enuity in Practice: Stable 15 nm Sections at ZFE
After using the UCT and UC6 ultramicrotomes, Claudia Mayrhofer calls UC Enuity a leap in…
Mar 25, 2026Read article -

Ultramicrotomy eBook: Targeting, Trimming & Alignment
Ultramicrotomy is evolving rapidly, and today’s microscopes demand high‑quality sections, precise…
Feb 11, 2026Read article -
 image of a cross section of C. elegans (roundworm). Courtesy of T. Müller-Reichert, MPI-CBG, Dresden, Germany and K. McDonald, University of California, Berkeley, USA.")
Brief Introduction to High-Pressure Freezing for Cryo-Fixation
Preparation of biological specimens for electron microscopy (EM) often requires cryo-fixation which…
Dec 16, 2025Read article
