I. Initial patient presentation
Patient:
An 18-year-old male patient was brought to the hospital's emergency room after having been found unconscious. Although the patient had no previous medical records, he had a history of loss of conscience. Before he was brought into the emergency room, he felt dizzy and had had a headache.
Neurological exam:
The neurological exam showed a slight somnolence, as well as the absence of nerve palsies and abnormalities of motor, gait, balance, and sensory functions. There was no evidence of cranial hypertension and papilledema was detected. The patient was given analgesics, but did not experience any pain relief.
Diagnosis:
The patient underwent an initial CT brain scan (Fig. 1a), which revealed a large Galassi type III arachnoid cyst on the left middle cranial fossa (represented by red arrows) measuring 9.0 cm x 3.9 cm x 9.7 cm.
Initial CT imaging assessment
The MRI exam for further preoperative imaging investigation revealed that the cyst was located in close proximity to the frontoparietal operculum and the parietal- occipital convexity, slightly compressing the sulci of the left hemisphere and deviating the midline to the right side (Fig. 1 b-j). With magnetic resonance imaging reconstruction the exact location of the cyst and its volume could be identified. The volume of the Galassi type III arachnoid cyst was measured to be 240 cm3. The volumetric MRI image reconstruction was carried out with the Elements and SmartBrush Software from Brainlab.

Fig.1: Volumetric magnetic resonance imaging reconstruction. A) Brain CT scan showing a large Galassi type III arachnoid cyst on the left middle cranial fossa (represented by red arrows). B) Outlines of the cyst and draining vessels. C) Volume scan of the Galassi type III arachnoid cyst. D) A 3D representation of the cyst for the 360° assessment. E) A 3D volume scan showing the middle cerebral artery in detail. F) A 3D visualization of the cyst from different angles for better assessment of the size and location of the cyst. G) A 3D visualization of the cyst from different angles for improved assessment of the size and location of the cyst. H) A 3D visualization of the cyst from different angles for better understanding of the size and location of the cyst. I) A 3D visualization of the cyst from different angles for improved assessment of the size and location of the cyst. J) Saggital, axial, and coronal views. Volume information for the large Galassi III type arachnoid cyst: 240 cm3.
II. Pre-operative imaging assessment
The MRI exam results were used to plan the surgical procedure in detail and allowed to rule out any possible differential diagnosis beyond the arachnoid cyst. The T1WI weighted sequence of the brain MRI revealed a large arachnoid cyst (represented by red arrows) on the left side with a hypo-signal when compared to the brain, including a similar signal to cerebral spinal fluid, with no evidence of hemorrhage.
")
Fig. 2: T1 weighted brain MRI showing a large arachnoid cyst (represented by red arrows with a hypo-signal compared to the rest of the brain and iso-signal when compared to the cerebrospinal fluid inside the ventricles).
The T2WI revealed a large arachnoid cyst (represented by red arrows) on the left side with a hyper-signal when compared to the brain, including a similar signal compared to the cerebral spinal fluid.
, Galassi III with a hyper-signal compared to the brain, and iso-signal when compared to the cerebrospinal fluid inside the ventricles.")
Fig. 3: T2 weighted MRI showed a large arachnoid cyst (red arrows), Galassi III with a hyper-signal compared to the brain, and iso-signal when compared to the cerebrospinal fluid inside the ventricles. This cyst is compressing the adjacent brain and is not communicating with the Sylvian, carotid, and optic-Chiasmatic cisterns).
Diffusion and ADC (Apparent Diffusion Coefficient) MRI brain sequences
The brain MRI in the diffusion and ADC map sequences revealed no diffusion restriction of the cyst, confirming the preoperative hypothesis of a large arachnoid cyst (represented by red arrows), excluding the possibility of dermoid and epidermoid cysts.

Fig. 4: Diffusion and ADC map sequences show a large arachnoid cyst with no diffusion restriction, excluding the possibility of a dermoid and epidermoid cysts, as well as that of an empyema and an abscess.
III. Treatment decision and surgical procedure
Treatment decision
The patient began presenting initial symptoms of elevated intracranial hypertension. The brain CT and MRI scans showed a large Galassi type III left arachnoid cyst that was slightly impacting the midline and compressing the convexity sulci. Based on these findings, a decision was taken to adopt a fenestrated approach to the cyst basal cisterns, as well as to restore the cerebrospinal fluid circulation and decrease the intracranial pressure. The surgical approach was approved by both the patient and his parents.
Surgical Procedure
The patient was placed in the supine position, with his head fixed using a three-pin holder with rotation of 10° to the right, as well as with extension to elevate and have a better view of the malar prominence.
Surgical Procedure (continued)
A 4-cm semi-curved incision centered on the left temporal region was performed, after which a musculocutaneous dissection of the temporal muscle was performed, and self-retaining retractors were used to expose the pterion. A minipterional craniotomy of 3.5 cm was performed to access the cyst and the basal cisterns. After opening the dura mater, a thick cyst wall could be visualized. The lateral cyst wall was resected to gain access to the contents of the cyst.
After the drainage of the cyst fluid, the medial wall could be seen compressing the temporal and frontal lobes. The inner wall was fenestrated with blade #11 to connect the cyst with the Sylvian cistern.
Once the Sylvian fissure was opened, the middle cerebral artery was exposed.
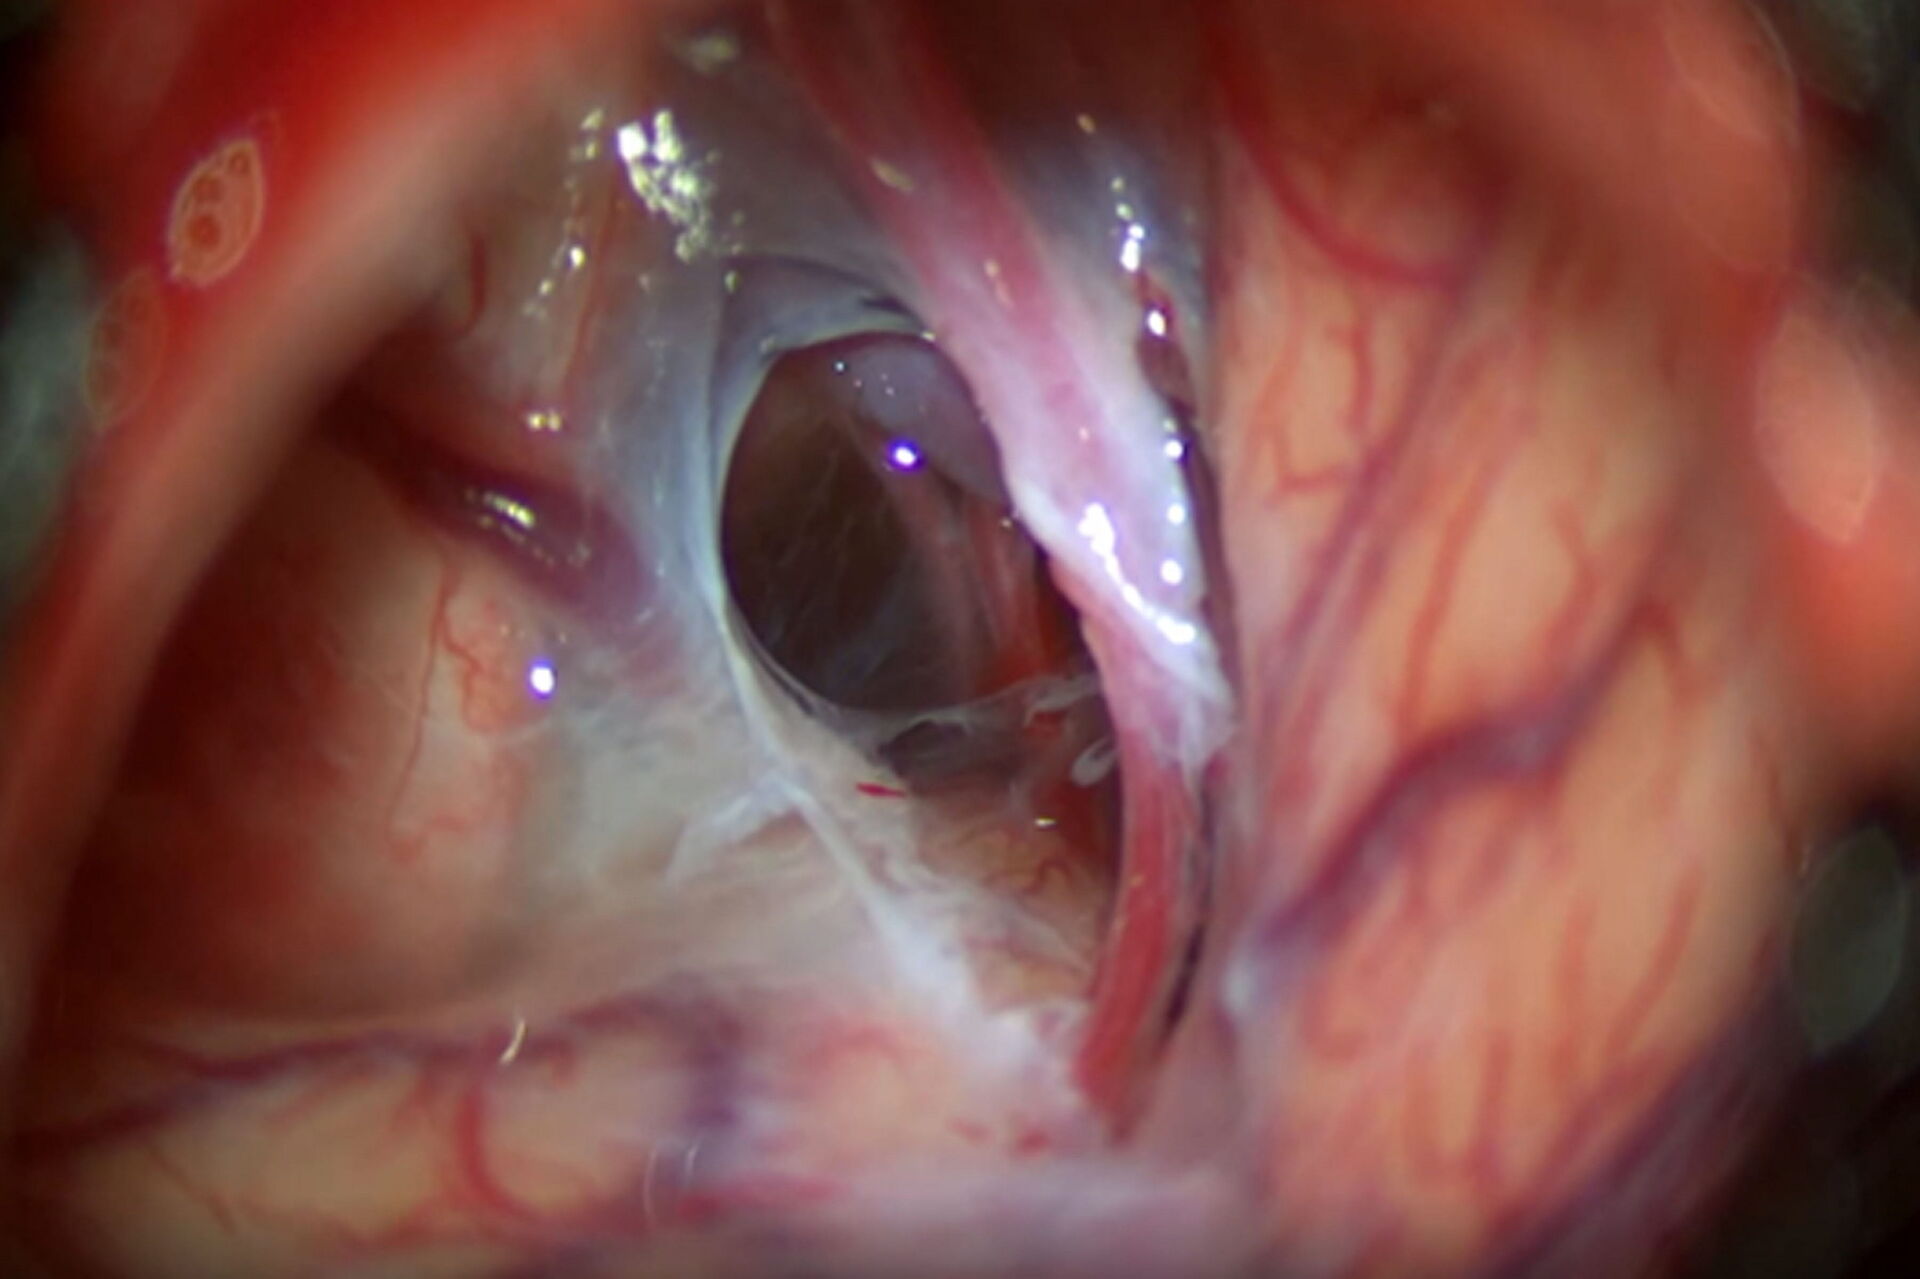
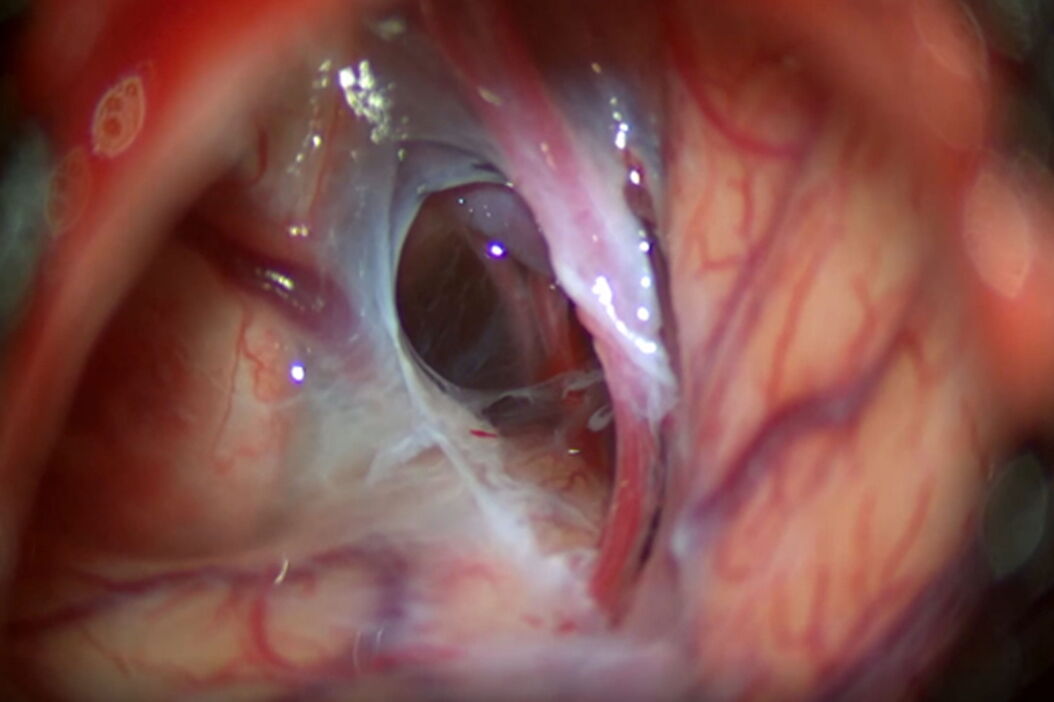
After opening the Sylvian and carotid cisterns, the membrane covering the carotid oculomotor space was opened and fenestrated with a curved microscissor, exposing the posterior communicating artery (Fig. 5).

Fig. 5: Removal of the membrane from the carotid oculomotor and exposing of the posterior communicating artery.
After being exposed, the Liliequist membrane was opened to connect the cyst to the interpedicular membrane (demonstrated in Video 6).
Once the fenestration and connections were completed, it was possible to have a complete view of the left carotid artery with the posterior communicating and choroidal arteries above the dorsum sellae (Video 7).
VI. Postoperative assessment and imaging
The patient had an uneventful follow-up with complete remission of symptoms. He was discharged from the ICU on the first postoperative day. On the second postoperative day, the patient underwent an MRI scan that revealed a normal flux from the cyst to the prepontine and interpeduncular cisterns, as demonstrated in Fig. 6 represented by red arrows. The patient was discharged on the third postoperative day.
Patient 2-month follow-up exam:
At the second postoperative month the patient remained symptomless. Furthermore, he was not using any analgesics and had a normal neurological exam.

Fig. 6: T2 weighted MRI image shows a normal flow from the cyst to the prepontine and interpeduncular cisterns.
VI. Impact of the M530 OHX surgical microscope on the treatment of a Galassi type III cyst
Optimal depth perception and 3D view
During the entire treatment of the arachnoid cyst, it was essential to have a realistic threedimensional picture of the cyst's anatomy and location. The M530 OHX surgical microscope ensured a brightly illuminated view and excellent color representation, which allowed me to easily differentiate between brain tissue and membranes, as well as apply my surgical skills precisely and efficiently. While working through the eyepieces, I had an optimal view, thanks to FusionOptics providing a clear and fully focused view without having interruptions due to refocusing. I could easily see brain and vascular structures to proceed with the drainage of the cyst by dissecting, connecting, and fenestrating the membranes, even in deep cavities.
At the end of surgery, after the fenestration and the connection between the Liliequist and interpeduncular membrane were completed, I had a complete view of the left carotid artery with the posterior communicating and choroidal arteries above the dorsum sellae (Video 7).
Reliable images and illumination
During the dissection of the Liliequist and interpeduncular membranes, which are almost transparent, the Leica optics of the M530 OHX delivered a crisp image in natural colors, which helped to distinguish between layers more easily. The illumination of the M530 OHX provided a clear view and the light reflection from the transparent membranes made it easier to perform dissection. In addition, the liquid that had accumulated in the cyst was clearly visible in the cyst.
Deep Insights with the Small Angle Illumination (SAI) of the M530 OHX
SAI combined with bright 400-Watt xenon light provides a concentrated light beam that penetrates to the bottom of deep, narrow cavities. The result is better illumination with less shadow. SAI provides visualization of more
details and an improved depth perception.

Fig. 7: Combined with intelligent illumination and apochromatic Leica optics the FusionOptics technology delivers an astounding image quality.
Good ergonomics are key
Surgeons plan and create an efficient OR set-up prior every surgical intervention. The placement of the microscope in relation to the surgeon, the team and the patient on the operating table in the OR must be carefully thought through and optimized. Therefore, it's extremely important that the surgical microscope used for the procedure is easy to set-up and maneuver. Dr. Devanir pointed out that the M530 OHX surgical microscope is very easy to bring into position and allows for a fast set-up in the operating theater, which is an important advantage for the medical team preparing for the surgery. Furthermore, the long reach of the microscope arm proved to be very useful, as it allowed the assistant and the scrub nurses to stand comfortably next to the surgeon during the treatment of the arachnoid cyst.

Fig. 8: With a compact base for space-restricted areas, large overhead clearance and one of the longest reaches on the market, the M530 OHX offers positioning flexibility and more space for a wide range of procedures.


